![Armor in Honkai: Star Rail [best build]](/wp-content/uploads/2023/04/Screenshot_1-10.jpg)
Detailed guide to Armor in Honkai: StarRail with recommendations for creating the best build to increase the power of your character and team. Matching relics and light cones, as well as descriptions of skills, tracks and eidolons. Advantages and disadvantages. The principle of the game, rotation, and everything that Armor needs to level up.
Armor is a legendary character who has the wind type of damage and adheres to Ways of Harmony. As the commander of the Silvermane Guard, she is a strong and graceful fighter who serves as a support role on the battlefield. At the same time, being the successor of the Guardian of Belobog, she has a proud but fair disposition. The girl is ready to do everything possible to prosper the city and provide better living conditions for her people.
| Rating | S position in dash list |
| Rarity | ⭐⭐⭐⭐⭐ |
| [Type] element | Windy🌪️ |
| Path | Harmony |
| when added to the game | April 26, 2023 (patch 1.0) |
| How to get a character | "Standard Jump" and "Starting Jump". Losing 50/50 in the event banner "Event Jump: Character" |
| Gender | Female |
| Home region | Belobog |
| Role in the squad | Buffer |
| Role in the game |
|
| signature light cone | "The Battle Isn't Over" |
| Voice actors |
|
Brony biography in Honkai: Star Trail

Honkai Armor: Star Rail is the elegant and sophisticated heir to Cocolia, High Guardian of Belobog, as well as a capable captain of the Silvermane Guard. From early childhood she received a strict education and underwent constant training, which allowed her to acquire the skills and qualities of the future leader Belobog.
One day, the girl had to face the Underworld and its terrible conditions, in stark contrast to the Aboveground part of the city. After that, huge doubts appeared in her mind about the knowledge she received in the process of training: "Can training really help lead people to the life they want and deserve?" Bronya will have to ask herself this question more than once and make an important choice that will decide the fate of the city and its people.
How to get Armor in Honkai: Star Rail
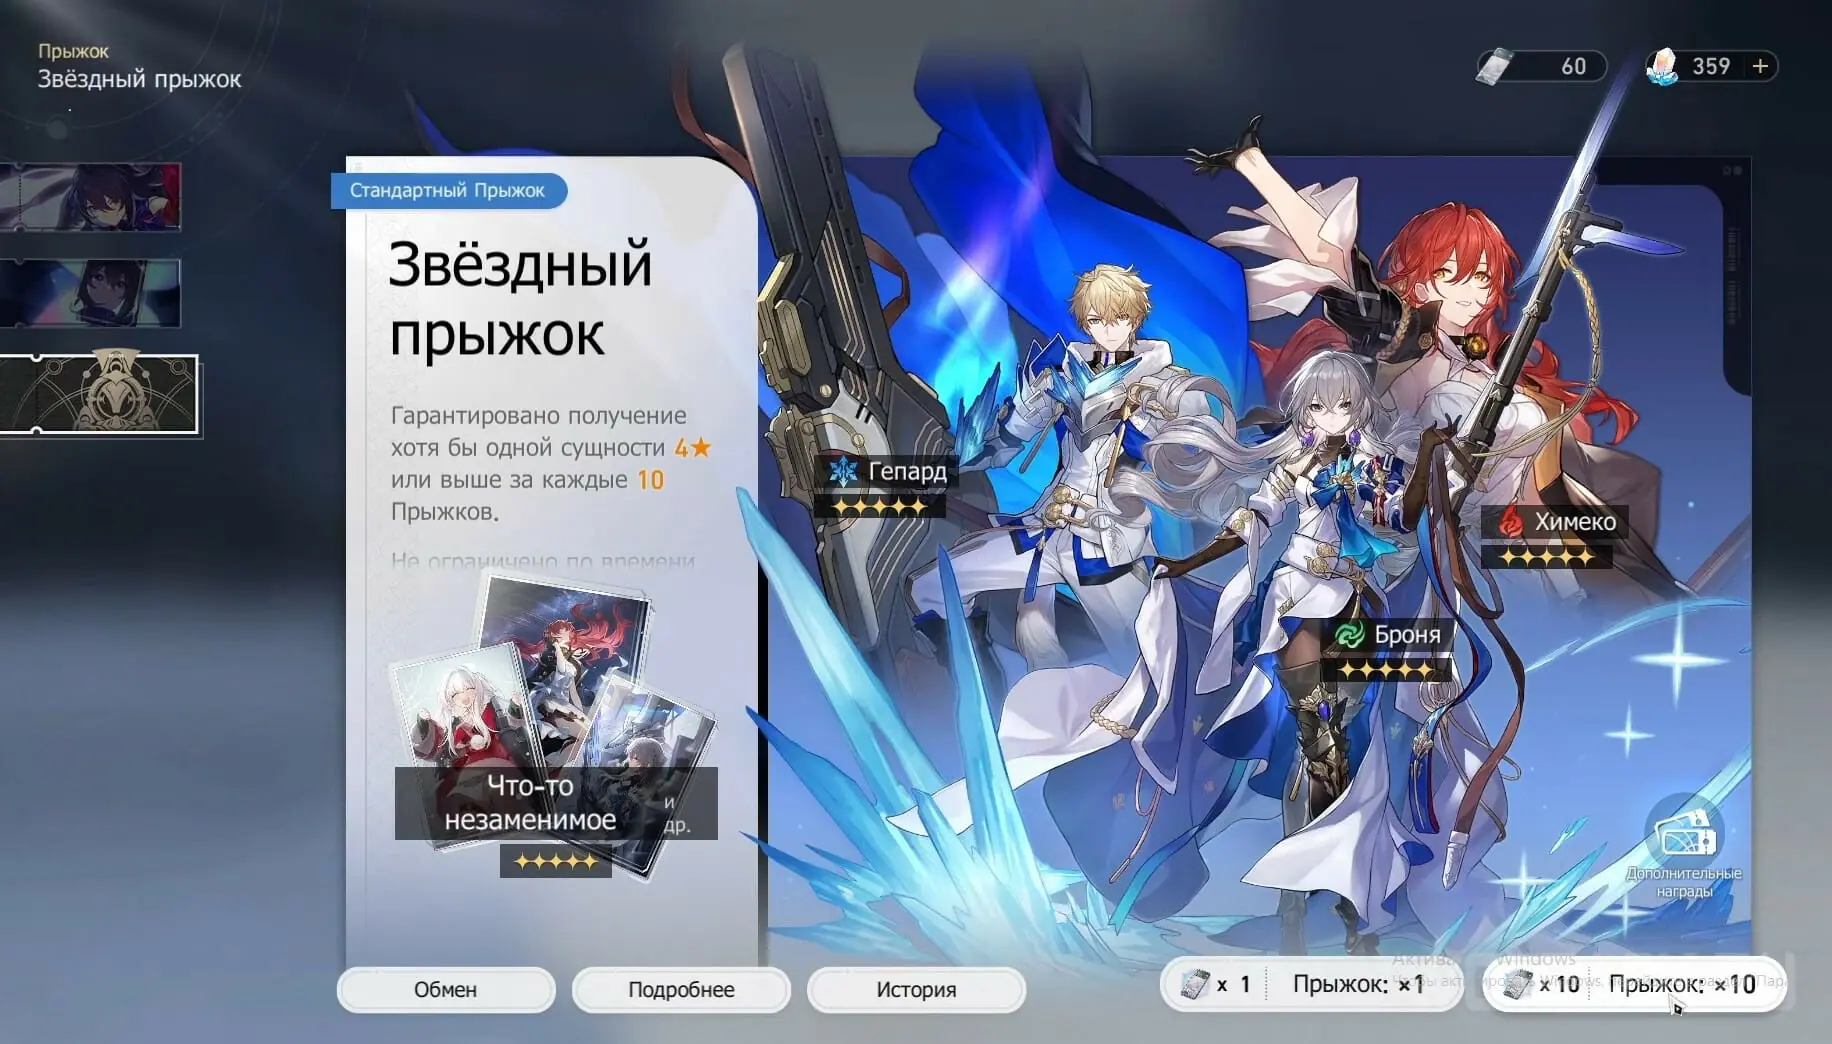
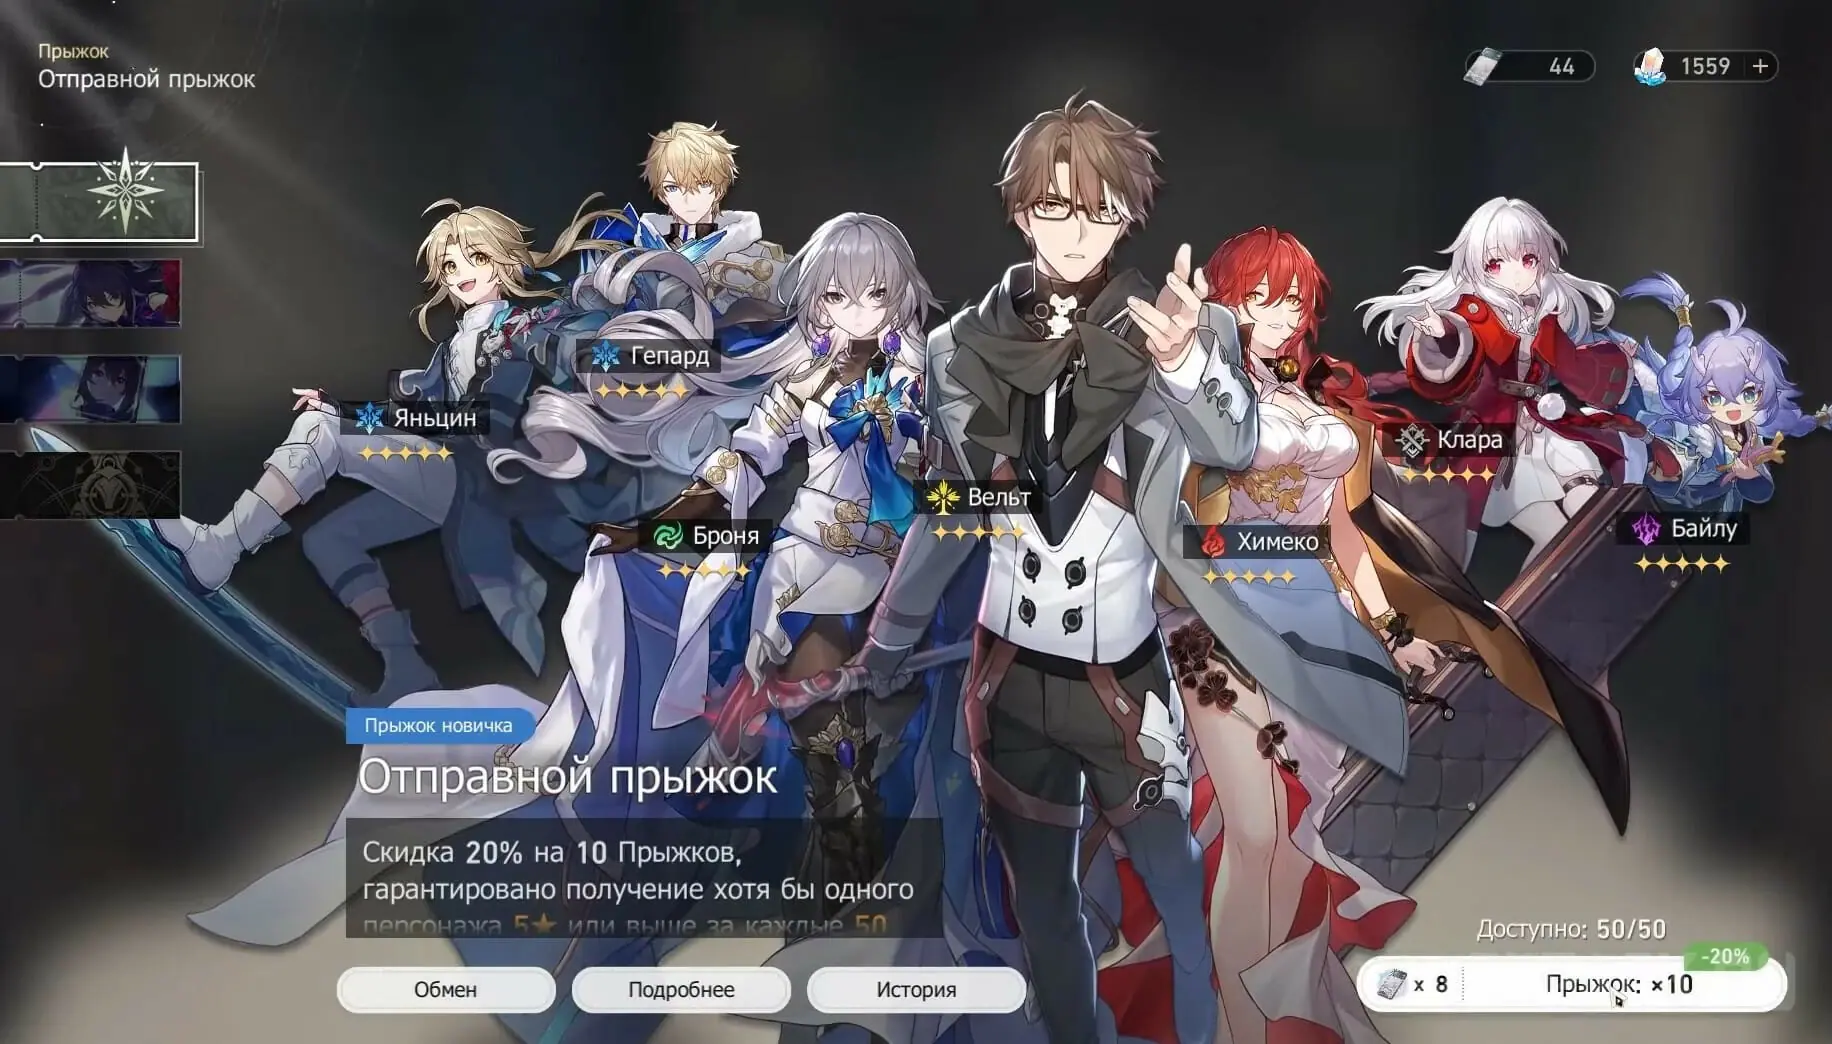
Armor can be obtained from the permanent Star Jump banner or from the Beginner's Jump Start banner for 50 spins. Upon receiving repeated copies, Eidolons [Constellations] are opened. It will also drop on a 50/50 loss from the Event Jump: Character event banner.
Features
Along with the rise of Armor, HP, attack power and defense indicators increase. Speed and taunt are permanent stats. The exact values of the stats can be found in the table.
| Level of | Base HP | Basic Attack | Basic protection | base speed | Basic taunt |
| 1 | 168 | 79 | 72 | 99 | 100 |
| 10 | 245 | 114 | 105 | 99 | 100 |
| 20 | 397 | 186 | 170 | 99 | 100 |
| 30 | 549 | 257 | 235 | 99 | 100 |
| 40 | 701 | 328 | 301 | 99 | 100 |
| 50 | 853 | 399 | 366 | 99 | 100 |
| 60 | 1005 | 471 | 431 | 99 | 100 |
| 70 | 1157 | 542 | 497 | 99 | 100 |
| 80 | 1241 | 582 | 533 | 99 | 100 |
Basic skills

Armor's skills make her one of the best buffer characters available in the game. By following the Path of Harmony, she helps the team and strengthens her comrades, increasing the indicators necessary in battle (attack power, critical damage, total damage). This becomes especially true in the later stages of the game, when the difficulty of enemies and gameplay increases.
The main feature of the guard commander is promoting an ally's action. This mechanic gives a huge tactical advantage over any enemy, as it allows you to deal more damage within one cycle or, for example, heal a squad member in a timely manner. Let's take a closer look at how Armor's abilities work, and also look at the order in which they are best upgraded.
Active skills
- Technique "Under the Banner of Command"
After using a technique at the beginning of the next battle, the attack power of all squad members is increased by 15% for 2 turns.
- Basic Attack "Bullet Flying in the Wind"
Deals wind damage equal to 50-130% of own attack power to one of the enemies on the battlefield.
- Emboldening Salvo "Combat redeployment"
Removes 1 debuff from the targeted party member, causing them to immediately take an action (take an extra turn), and increase their damage dealt by 33-82,5% for 1 turn.
- Superpower "March of Belobog"
Increases the attack power of all allies by 33-66% and their critical damage by 12-18% of their own crit value. damage and an additional 12-24% for 2 turns.
Passive skills
- Talent "One step ahead"
After using a basic attack, the next action advances 15-37,5%.
The order of leveling abilities
In the process of increasing the level of Armor skills, we recommend following the following order:
- Superpower – main enhancing skill. Upgrading your ult depends on increasing the attack power and critical damage of all allies.
- Emboldening Salvo – will affect the increase in damage dealt to the selected squad member, which is an equally important source of buffs.
- Talent – advances the action of the Armor forward by several percent after it makes a normal strike. Allows you to “keep up” with your allies, especially at low speed.
- Basic Attack – used infrequently, but due to the trace "Order", which increases the critical chance of a normal hit by 100%, it makes sense to improve it for additional damage. The attack becomes more significant after the opening of the fourth eidolon.
Tracks
Armor Footprints unlock additional passive skills that help the squad and strengthen it itself through bonuses and increasing certain characteristics.
| Order: crit chance base attack hit is increased to 100%. | Battlefield: At the start of a battle, increases the defense of all party members by 20% for 2 turns. | Military power: When Armor is in combat, the damage of all allies is increased by 10%. |
| Crete. damage +5,3%. | Wind Damage Bonus +4,8%. | Status Resistance +6%. |
| Wind Damage Bonus +3,2%. | Crete. damage +8%. | Crete. damage +10,7%. |
| Wind Damage Bonus +6,4%. |
Separately from the considered passive skills, the following indicators are pumped: wind damage bonus + 3,2% and + 4,8%, resistance to effects + 4%.
Total amount of increase in stats:
| Wind Damage | + 22,4 % |
| Critical Damage | + 24 % |
| Effect Resistance | + 10 % |
Eidolons [Constellations]
All Armor Eidolons:
| number | Name | <font><font>Materials</font></font> |
| 1 | Sharpen your strength | 50% chance to restore 1 skill point when using a skill. The effect has a 1-turn cooldown. |
| 2 | fast march | The target ally's speed is increased by 30% for 1 turn after taking an action. |
| 3 | Artillery shelling | Superpower level +2. Talent level +2. Max. level: 15. |
| 4 | Take the enemy by surprise | After an ally uses a basic attack on an enemy with a wind vulnerability, the Armor immediately performs a bonus attack that deals wind damage equal to 80% of the basic attack's damage to the affected enemy. The effect can only work 1 time per turn. |
| 5 | We cannot be stopped | Skill level +2. Basic attack level +1. Max. level: 15. |
| 6 | Piercing the rainbow | The target ally's damage increase from the skill is extended by 1 turn. |
Best Armor Eidolons – E1, E2 и E4:
- First eidolon: Provides an increase in skill points after using a skill, which will benefit not only Armor, but also other allies. In a turn-based system, combat power increases greatly if the team takes actions more often than the enemy.
- Second eidolon: Increases the speed of the ally on whom the Armor skill was used. This means that he will be able to start his turn earlier. The bonus is especially relevant for heroes focused on achieving high speed indicators, such as Seele.
- Fourth Eidolon: allows the Silver Mane commander to not only restore energy faster, but also deal additional damage. This is made possible by triggering bonus attacks, when one of the party members makes a normal strike against an enemy with a wind vulnerability.
Advantages and disadvantages of Armor

Armor occupies a leading position in the character rating. Nevertheless, it has both strengths and weaknesses that are important to consider.
| Advantages | Disadvantages |
| Provides the squad useful buffs. Increases the attack power of your technique and ultimate, as well as all damage dealt by the skill. In addition, the ult increases crit. damage, allowing allies to focus on crit chance. | Armor is an excellent support even without awakenings (eidolons) with three-star equipment, but to unlock maximum potential and a more comfortable game it is necessary E1 and / or signature light cone. |
| With skill promotes action target ally forward, giving him the opportunity to take an extra turn and deal more damage in one cycle. Wherein removes weakening. | Consumes skill pointsto use a skill to advance an ally’s action, strengthen it, and restore your own energy. This can “disturb” teammates if skill points are not distributed correctly. |
| Due to the “Order” and E4 trail, it can cause damage: Receives 100% crit. chance for a basic attack and the ability to perform bonus attack, if an ally under the skill buff uses a normal strike on an enemy with vulnerability to wind. | Increased attack power from using a technique does not stack with similar effects. For example, it does not stack with the bonus from vehicles Dan Heng "Cutting edge." |
| Has an additional source of DPS increase for the team: increases all unit damage by 10% after receiving the “Military Power” trail (at hill A6). | Necessary adjust speed Armor for main-dd. It is desirable that it is always lower. In this way, the guard commander will be able to effectively implement his skill. |
| Gives allies the necessary boosts, thereby freeing up a slot for another damage dealer. In a team with her, additional ones are often not needed. supports the Path of Harmony, at the same time she can perfectly cooperate with them. | has low base defense and HP, making her vulnerable to receiving lethal damage. To “densify” a character, you will need to collect defense, health and resistance to effects in stats. |
| Easy to assemble. It is enough to pump up energy recovery, crit. damage and speed to the optimal value in order to 100% cope with your main task. |
Leveling up Armor in HCP
This paragraph presents the total amount of materials for leveling Armor, including the components of the ascension and development of the level of passive, active abilities and traces.
Elevation materials
| Level of | Material 1 | Material 2 | Material 3 |
|---|---|---|---|
| 30 |  Credits ×4,000 Credits ×4,000 |  Silvermane Guardians Badge ×5 Silvermane Guardians Badge ×5 | |
| 40 | Credits ×8,000 | Silvermane Guardians Badge ×10 | |
| 50 | Credits ×16,000 |  Silvermane Guardians Insignia ×6 Silvermane Guardians Insignia ×6 |  Eye of the Storm ×3 Eye of the Storm ×3 |
| 60 | Credits ×40,000 | Silvermane Guardians Insignia ×9 | Eye of the Storm ×7 |
| 70 | Credits ×80,000 | Eye of the Storm ×20 |  Silvermane Guards Medal ×6 Silvermane Guards Medal ×6 |
| 80 | Credits ×160,000 | Eye of the Storm ×35 | Silvermane Guards Medal ×9 |
Total Resources for Armor Ascension:
- Credits ×1 690 000. Currency is obtained by completing game activities such as quests, daily errands, events and so on.
- Silvermane Guardians Badge ×15, Silvermane Guardians Insignia ×15, Medal of the Silvermaned Guardians ×15. Can be obtained as a reward for killing Silvermane Guardians and Shadows of the Everlands. In addition, items are given upon completion Simulated Universe , running errands or shopping at Pom Pom store for the inextinguishable ashes.
- Eye of the Storm ×65. Can be obtained by completing Stagnant Shadow in Zaklepkograd.
- Travel Guides ×289, Adventure Logs ×6, Travel meetings ×3.
Skill Leveling Materials
To pump Armor skills and increase them to the maximum value, you will need to collect additional materials.
| Emboldening Salvo | Material 1 | Material 2 | Material 3 | Material 4 |
|---|---|---|---|---|
 Basic Attack "Bullet of the Wind Rider" Basic Attack "Bullet of the Wind Rider" | Credits ×240,000 |  Harmonious Melody ×3 Harmonious Melody ×3 Song of the Family ×8 Song of the Family ×8 Symphony of Constellations ×11 Symphony of Constellations ×11 | Silvermane Guardians Badge ×6Silvermane Guardians Insignia ×7Silvermane Guards Medal ×7 | |
 Emboldening Salvo "Combat redeployment" Emboldening Salvo "Combat redeployment" | Credits ×652,500 | Harmonious Melody ×3Song of the Family ×15Symphony of Constellations ×30 | Silvermane Guardians Badge ×9Silvermane Guardians Insignia ×13Silvermane Guards Medal ×7 |  Tracks of Destiny
×2 Tracks of Destiny
×2 Guardian's Sorrow ×3 Guardian's Sorrow ×3 |
 Superpower "Belobozhsky March" Superpower "Belobozhsky March" | Credits ×652,500 | Harmonious Melody ×3Song of the Family ×15Symphony of Constellations ×30 | Silvermane Guardians Badge ×9Silvermane Guardians Insignia ×13Silvermane Guards Medal ×7 | Tracks of Destiny
×2Guardian's Sorrow ×3 |
| Credits ×652,500 | Harmonious Melody ×3Song of the Family ×15Symphony of Constellations ×30 | Silvermane Guardians Badge ×9Silvermane Guardians Insignia ×13Silvermane Guards Medal ×7 | Tracks of Destiny
×2Guardian's Sorrow ×3 |
General list of components:
- Credits ×2 196 000.
- Silvermane Guardians Badge ×33, Silvermane Guardians Insignia ×46, Medal of the Silvermaned Guardians ×28.
- Harmonious Melody ×12, Song of the Family ×53, Symphony of Constellations ×101 Obtained by completing the Sepal Challenge in Robot Village.
- Tracks of Destiny ×6. Sold in Pom Pom store and are issued as an exclusive reward for events. An additional method is synthesis through the Universal Machine.
- Guardian's Sorrow ×9. Reward for completing Echoes of War in the Hill of Everwinter location (boss Kokoliya).
The sequence of pumping traces
In the table you can see the order of pumping traces of Armor and the required amount of resources.
| Skill / Stat | Material 1 | Material 2 | Material 3 | Material 4 |
|---|---|---|---|---|
 Wind Damage Bonus +3,2% Wind Damage Bonus +3,2% | Credits ×2,500 | Silvermane Guardians Badge ×2 | ||
 Command Command | Credits ×5,000 | Harmonious Melody ×3 | Guardian's Sorrow ×1 | |
 Crete. damage +5% Crete. damage +5% | Credits ×5,000 | Harmonious Melody ×3 | Silvermane Guardians Badge ×6 | |
| Wind Damage Bonus +3,2% | Credits ×10,000 | Song of the Family ×3 | Silvermane Guardians Insignia ×6 | |
 Status Resistance Status Resistance | Credits ×10,000 | Song of the Family ×3 | Silvermane Guardians Insignia ×6 | |
 Battlefield Battlefield | Credits ×20,000 | Song of the Family ×5 | Tracks of Destiny
×1 | Guardian's Sorrow ×1 |
| Wind Damage Bonus +4,8% | Credits ×20,000 | Song of the Family ×5 | Silvermane Guardians Insignia ×4 | |
| Crete. damage +7,5% | Credits ×45,000 | Symphony of Constellations ×3 | Silvermane Guards Medal ×3 | |
| Wind Damage Bonus +4,8% | Credits x45,000 | Symphony of constellations x3 | Silvermane Guard Medal x3 | |
 Military power Military power | Credits ×160,000 | Symphony of Constellations ×8 | Tracks of Destiny
×1 | Guardian's Sorrow ×1 |
| Status Resistance | Credits ×160,000 | Symphony of Constellations ×8 | Silvermane Guards Medal ×8 | |
| Crete. damage +10% | Credits ×160,000 | Symphony of Constellations ×8 | Silvermane Guards Medal ×8 | |
| Wind Damage Bonus +6,4% | Credits ×160,000 | Symphony of Constellations ×8 | Silvermane Guards Medal ×8 |
Total amount of materials:
- Credits ×802 500.
- Silvermane Guardians Badge ×8, Silvermane Guardians Insignia ×10, Medal of the Silvermaned Guardians ×30.
- Harmonious Melody ×6, Song of the Family ×16, Symphony of Constellations ×38.
- Tracks of Destiny ×2.
- Guardian's Sorrow ×3.
Best Armor Builds in Honkai: Star Rail

Armor in HSR is a support character who is focused on strengthening the team, so she needs characteristics that help her effectively carry out her main functions: increase attack power and crits, promote the action of one of the squad members. The Armor build is based on the selection of the following stats:
- Energy recovery. The main parameter that allows you to consistently activate your superpower and thereby apply key buffs to your allies.
- Critical Damage. A feature of the character is that crit. She increases damage to the team depending on her own indicator, so this stat is also a priority.
- Speed. Makes it possible to walk (perform actions) more often, and therefore use a skill or basic attack in a timely manner for additional energy regeneration.
Considering that the Silver Mane commander is quite vulnerable, it may be necessary to HP, protection и effect resistance. These characteristics will allow the heroine to feel much more comfortable on the battlefield, without fear of a deadly enemy attack.
Next, we will take a closer look at how to collect Armor in Honkai: Star Rail.
Recommended characteristic values
The main stats that are recommended to look for in relics:
| Relic | Main characteristic |
| Head | HP (permanent) |
| Arms | Attack Power (Permanent) |
| Body | Critical Damage |
| Legs | Speed |
| planar sphere | HP / Protection |
| Connecting rope | Energy recovery |
Additional characteristics should include the following indicators:
- Critical damage.
- Speed.
- HP%.
- Protection %.
- Effect resistance.
The optimal final values of stats that it is desirable to have on a character:
- Speed: about 121-134 units. This is an important characteristic, but it is worth noting that it is advisable for Armor to go after the main damage dealer, so as not to waste the effect of his skill. That is, by default its speed should be lower than that of DD.
- Energy recovery: from 119,4%.
- HP: from 3-500 units.
- DEF: from 1 units.
- Critical Damage: from 191%.
- Status Resistance: from 30%.
Despite Armor being a support position, with virtually no investment of resources, you can achieve high crit values by passively pumping up the stat by 24% in the “traces”. She is not the mainstay of the group, but is quite capable of contributing good DPS with her basic attack if necessary.
Ultimate Light Cone [Weapon]
When choosing a weapon for Armor, it is important to consider that it should relate to Ways of Harmony. Although the main stats (HP, defense, attack power) continue to operate, the passive effect only works with characters of the corresponding role. Required stats in this case: energy recovery, Crete. damage и speed.
| Name | Description | Recommendation |
|---|---|---|
 But the Battle Isn't Over But the Battle Isn't Over⭐⭐⭐⭐⭐ HP: 52-1164 ATK 24-529 DEF 21-463 | Increases energy recovery by 10-18% and restores 1 skill point after using a superpower. This effect can be used 1 time per 2 activations of the ult. When the owner uses a skill, the damage of the ally taking the next action is increased by 30-50% for 1 turn. | The undisputed top 1 option per character. The signature weapon of the Armor instantly covers all its possible shortcomings, as it solves the problem with the lack of skill points, restores energy for more frequent use of the ultimate, and at the same time additionally increases the team's damage. |
 Worldly pranks Worldly pranks⭐⭐⭐⭐⭐ HP: 52-1164 Attack Power: 24-529 Protection: 21-463 | Increases crit. damage per 32-60%. At the beginning of the battle, the wearer of the weapon “card” is assigned the “Mask” status, which lasts for 3 turns. When the hero is under the influence of the “Mask” effect, crit. the chance of all allies increases by 10-14%, and crit. damage - by 28-56%. When a character restores a skill point (skill points exceeding the limit are taken into account), he receives 1 lvl. "Shining Flame" charge. Upon reaching level 4. charge, “Shining Flame” is replaced by the “Mask” effect, which lasts for the next 4 turns. | The light cone will open best if you have E1 “Hone Your Strengths”, since with it, when using the Armor skill, it will have a certain chance of restoring action points. But if you balanced its speed relative to the main damage control, then even without an eidolon, the weapon will improve the crit parameter of all allies. Passive crit. the damage is useful to Armor for the effectiveness of its superpower to increase this stat to allies. |
 Past and Future Past and Future⭐⭐⭐⭐ HP: 43-952 ATK 19-423 DEF 18-396 | Using a skill increases the damage of an ally who takes an action behind him by 16-32% for 1 turn. | Considering that the Armor skill already increases the damage of an ally, the weapon will further enhance this effect. Thus, at skill level 10 and the first awakening of the cone, the total damage bonus will be 82%, which is a significant increase in DPS. |
 Fleeting night lights Fleeting night lights⭐⭐⭐⭐⭐ HP 43-953 ATK 28-635 DEF 21-463 | The bearer of the light cone receives level 1. Cantillation every time any ally makes an attack. Every level “Cantillation” increases the energy recovery rate of a hero equipped with a weapon “card” by 3-5% — this effect can stack up to 5 times. When the wielder uses a superpower, the Cantillation effect is replaced with the Cadence condition. "Cadence" increases the attack power of the wearer character by 48-96%, and the damage dealt by allies is reduced by 24-40%. The duration of the effect is 1 turn. | A good alternative if there are no better options. The armor does not need attack power, but the weapon's effect will help restore energy for its superpower and strengthen the rest of the squad for the turn after it. The bonus will demonstrate itself more powerfully if the team has two damage dealers instead of one. |
 Carve the Moon, Weave the Clouds Carve the Moon, Weave the Clouds⭐⭐⭐⭐ HP: 43-952 ATK 21-330 DEF 15-476 | At the start of combat, or before the wearer takes an action, one of the effects will randomly activate: All allies gain Strength by 10-20%, crit. damage per 12-24% or energy recovery 6-12%. The selected effect will replace the previous one and will not be the same as last time. The bonus disappears after the death of the owner. Effects of this type do not stack. | An epic cone of light that provides good buffs to the team, including the wearer. The only drawback is that only one boost is given at random. However, based on the previous buff, you can roughly guess which one will activate in the next battle, since they do not repeat. In addition, all bonuses, one way or another, are beneficial, especially to damage dealers. |
 Adventures of Grezaville Adventures of Grezaville⭐⭐⭐⭐ HP 43-952 ATK 19-423 DEF 18-396 | After the owner uses a basic attack, skill, or superpower, he applies the Childish status to all allies. This status increases the damage dealt by an ally's corresponding skill by 12-20%. The Childish status only works with the owner's last used skill, and it cannot stack. | In the absence of the signature “The Battle Is Not Over” and its alternative “Past and Future”, you can consider this weapon from the “Passage of Light Cones”. Since in battle Armor promotes the action of an ally with a skill, the boost applies to all abilities of this type in the team. Thus, situations in which weapons are used to their maximum are limited to pairings with a damage dealer who plays solely on skills. In other cases, for example, when playing with Blade, which relies on basic attacks, would be better suited to Rendezvous with the Stars. |
 Dance! Dance! Dance! Dance! Dance! Dance!⭐⭐⭐⭐ HP: 43-952 ATK 19-423 DEF 18-396 | When the wielder uses a superpower, all allied actions move forward by 16-24%. | Combined with a skill that causes the targeted team member to immediately perform an action, this cone will allow the entire squad to activate even more abilities (=deal more damage) over the course of one cycle. The cone will be especially useful in the Hall of Oblivion. |
 Date with the stars Date with the stars⭐⭐⭐⭐ HP 48-1058 ATK 19-423 DEF 15-330 | At the start of combat, when an ally deals damage of the same type as the owner's attack type, their damage dealt is increased by 12-24%. | A good cone of light that will increase the damage of characters who have the same element as Armor (i.e. wind). It is not recommended to equip it if there are no wind heroes in the squad, since in this case the effectiveness of the card is reduced. |
 Memories of the past Memories of the past⭐⭐⭐⭐ HP: 43-952 Attack Power: 19-423 Protection: 18-396 | Increases the penetration special effect by 28-56%. When the owner attacks, heals himself 4-8 units energy. This effect can only be triggered once per turn. | With this weapon, the Guard Commander will be able to deal more damage over time from Weather if he breaks through a vulnerability. However, to activate the effect, you must attack the enemy, that is, use a basic attack. Another nice bonus is energy recovery. |
 interlocked gears interlocked gears⭐⭐⭐ HP: 38-846 ATK 14-317 DEF 12-264 | After the owner makes an attack or takes damage, restore 4-8 units energy. This effect can only be activated once per turn. | A good starting light cone that helps charge your superpower faster. To do this, it is enough to use a basic attack in parallel with abilities or simply take damage. |
 Chorus Chorus⭐⭐⭐ HP: 38-846 ATK 14-317 DEF 12-264 | At the beginning of the battle, increases the attack power of all members of the squad by 8-12%. Cannot stack with effects of this type. | The attack power bonus at the beginning of the fight is quite useful, and it does not require any conditions to be met. Considering it's a 3-star cone, it's also fairly easy to get it maxed out. |
 Consonance Consonance⭐⭐⭐ HP: 38-846 ATK 14-317 DEF 12-264 | At the start of combat, all allies' speed is increased by 12-20 units for 1 turn. | The weapon increases the speed of the entire squad. In some situations, this will allow the bulk of the characters to move earlier than the opponents, providing an advantage. |
Best Relics [artifacts]
Relics for Armor should increase its key parameters: energy recovery, crit. damage, speed и defensive stats (HP, effect resistance). The wind damage and attack power bonuses are useful in some situations to deal more damage with normal hits.
Cave relics [main artifacts]
| Name | Effects | Recommendation |
|---|---|---|
 The priest's thorny path The priest's thorny path⭐⭐⭐⭐ ⭐⭐⭐⭐⭐ | 2 parts: Increases speed by 6%. 4 parts: Using a skill or super ability on an ally increases the skill target's crit damage by 18% for 2 turns. This effect can stack up to 2 times. | The best set that allows you to effectively support the main damage dealer. The set not only increases the heroine's own speed, making her rotation more consistent, but also allows you to additionally buff the critical damage of one ally after using the skill. In turn, the Armor is able to easily maintain and accumulate stacks. |
⭐⭐⭐⭐ ⭐⭐⭐⭐⭐ | 2 parts: Increases speed by 6%. 4 parts: Increases the speed of all allies by 12% when the owner uses a super ability on an ally, for 1 turn. The effect does not stack. | "Belobog's March" is one of the strongest ultimate abilities of the Path of Harmony, which increases the attack power of allies and their critical damage. With the set in question, Armor will be able to increase the speed of characters in the squad: after all, this stat is extremely necessary for many heroes acting as main DD. |
 Musketeer of Wild Wheat Musketeer of Wild Wheat⭐⭐⭐⭐ ⭐⭐⭐⭐⭐ | 2 parts: Increases attack power by 12%. 4 parts: Increases speed by 6% and basic attack damage +10%. | Provides an increase to attack power and normal hits. Although Poke is used less frequently compared to other abilities, this set will allow you to deal more damage with your basic attack (which is also a way to regenerate skill points), so the bonus will come in handy in many situations. |
 long-lived student long-lived student | 2 parts: Increases speed by 6%. 2 parts: Increases HP by 12%. | If necessary, you can combine “The Messenger Wandering in Hacker Space” and “Long-Living Apprentice” if you cannot collect the complete sets discussed above. This will increase the Armor's speed and HP, providing additional "strength". |
 Twilight Eagle Twilight Eagle⭐⭐⭐⭐ ⭐⭐⭐⭐⭐ | 2 parts: Increases wind damage by 10%. 4 parts: After using the superpower, the action moves forward by 25%. | A set that will move the action forward, allowing you to take an extra turn with some chance, and will increase elemental damage when using a basic attack. The disadvantage is that the sequence of actions can be disrupted, causing the Armor to go ahead of the damage dealer. This must be taken into account when outfitting. |
Planar Ornaments [Additional Artifacts]
| Name | Effects | Recommendation |
|---|---|---|
⭐⭐⭐⭐ ⭐⭐⭐⭐⭐ | 2 parts: Status Resistance +10%. If the wearer's status resistance is greater than or equal to 30%, the crit. All allies' damage is increased by 10%. | Being a buffer, he needs protection from debuffs in order not to miss a turn and provide the squad with buffs in a timely manner. Since the resistance to effects is also pumped through traces, she will be able to gain 30% without any problems and further increase the critical damage of the team. |
 Fleet of the Ageless Fleet of the Ageless⭐⭐⭐⭐ ⭐⭐⭐⭐⭐ | 2 parts: Increases HP by 12%. When speed reaches 120 or higher, all allies gain +8% attack power. | This decoration is great for Armor, as it allows you to further increase the attack power of the entire team. Increasing her HP will also make her less vulnerable. To activate the bonus, 120 units are required. speed, but the heroine is quite capable of achieving this indicator. |
 Sprightly Vonwacq Sprightly Vonwacq⭐⭐⭐⭐ ⭐⭐⭐⭐⭐ | 2 parts: Increases energy recovery rate by 5%. If the owner's speed is at least 120 units, at the beginning of the battle the action immediately advances by 40%. | Provides a bonus to energy recovery and advances the action at the start of battle if the speed is at least 120 units. The set is effective, however, as with the wind set, promoting the action can negatively impact the rotation. You need to pay attention to this when selecting stats and squad. |
 Dreamland Penaconia Dreamland Penaconia⭐⭐⭐⭐ ⭐⭐⭐⭐⭐ | 2 parts: Increases energy recovery rate by 5%. Increases damage dealt by allies of the same type as the owner by 10%. | The energy recovery bonus allows you to use your ultimate more often. However, the option cannot be called universal, since the kit can be fully implemented only with wind DPS in the squad. If Armor is the only character of her element in the group, then it is worth considering other sets of planar decorations. |
⭐⭐⭐⭐ ⭐⭐⭐⭐⭐ | 2 parts: Increases energy recovery speed by 5%. If the owner is not in first place in the squad, the attack power of the character in first place increases by 12%. | Unlike the previous one, this set is compatible not only with wind heroes, but also with other elements. However, instead of a direct damage increase, attack power is given. To effectively implement the buff, you need to put the main DD in the first place in the group, and Armor in any free slot. |
 Celestial Differentiator Celestial Differentiator⭐⭐⭐⭐ ⭐⭐⭐⭐⭐ | 2 of: Increases crit. owner's damage | A set that can enhance the positive effect that Armor imposes on allies. The reason is that the strength of the crit buff depends on the character's personal crit damage indicator. The set in question will provide an additional boost to this stat. |
Squads for Armor
When selecting an Armor team, it is best to consider it as a support role for characters who deal the main damage (Hunting, Erudite, Destruction). In some situations, for example, oblivion hall or Simulated Universe Healers, shielders and debuffers may also be required. Overall, the Silver Mane Commander works well with many heroes as it complements and enhances them perfectly.
Best characters
The following characters can join a squad with Armor:
| Character | Path | Damage type | Features |
|---|---|---|---|
 Seele Seele |  Hunting Hunting |  Quantum Quantum | For Zele, the characteristics of attack power, crit are important. damage and speed - all that Armor provides in large quantities. Create powerful synergy at any stage of the game. |
 Yanqing Yanqing | Hunting |  Ice Ice | An equally powerful character that deals high damage to a single target. Combined with his own crit buffs and buffs from Armor, he increases his DPS many times over. |
 Feixiao Feixiao | Hunting |  Wind Wind | The action advancement, together with other bonuses offered by the Armor, is quite popular for the Arbiter General. During combat, it needs to gain a charge of "Winged Beast", which is given for attacks on any squad members, as a result, more frequent actions will allow you to receive them more actively. |
 Topaz and the Accountant Topaz and the Accountant | Hunting |  Fiery Fiery | DPS hero specializing in bonus attacks. Receives huge advantages in combination with heroes who also know how to carry out bonus attacks. In addition, he can exist as an independent damage dealer, occupying a leading position in a squad. |
 Doctor Ratio Doctor Ratio | Hunting |  Imaginary Imaginary | Veritas primarily occupies the position of the main damage dealer. When selecting a squad for a character, it is important not only to provide the hero with support in the form of representatives of the Path of Harmony, but also with comrades who can support at least 2 weakenings on enemies. This is important for the increased chance of activating his bonus attack, which is directly related to the negative statuses affecting opponents. |
 Boothill Boothill | Hunting |  Physical Physical | A basic damage dealer that is very effective against bosses and single targets. With the help of the skill, he begins a Duel with one enemy and receives enhancements. The armor will help him engage in Duels more often by promoting the action and provide other buffs. |
 Sushan Sushan | Hunting | Physical | She will benefit greatly from the increase in attack power, on which the damage of abilities depends. In addition, the increase in crit. damage will make it easier to select characteristics, concentrating on the chance of crit. hits. |
 March 7 March 7 | Hunting | Imaginary | A secondary damage dealer who, using a skill, applies the positive effect “Mentor” to the selected ally. It does good damage, and may well occupy the role of the main combat unit in a squad. In addition, it further strengthens itself, advancing the action and increasing outgoing damage. With the acquisition of eidolons, it gains mechanics related to performing bonus attacks. |
 Dan Heng Dan Heng | Hunting | Wind | Create a good tandem against enemies with wind vulnerability - Dan Heng deals the main damage, reducing the speed of enemies, while the Armor empowers and removes debuffs. |
 Himeko Himeko |  Erudition Erudition | Fiery | A character with explosive damage that can be multiplied by Armor buffs. It will also be happy to advance the action from the skill, as it has an average base speed indicator. |
 Greater Hertha Greater Hertha | Erudition | Ice | The outstanding scientist deals devastating damage when using her enhanced skill and superpower, and due to her mechanic's features, she needs another hero of the Path of Erudition. However, considering that she is also the backbone of the party, she will benefit from additional support from the Harmony character, as this will allow her to deal damage even more effectively. |
| Erudition | Imaginary | A damage dealer who plays from penetration and specializes in wearing down enemy durability while consistently dealing massive damage to all enemies on the battlefield with the enhanced basic attack gained from the ultimate. Benefits from the buffs provided by Armor such as action advance, overall damage, and attack power. | |
 Jasper Jasper | Erudition | Quantum | A secondary DPS character who prefers to fight against groups of enemies: the number of opponents on the battlefield directly determines the rate of accumulation of charge levels, which allow you to perform bonus attacks. As a skill, assigns an allied character as a “Debt Collector,” which additionally increases his speed by 30 units. When Debt Collector makes an attack, it deals quantum damage equal to Jasper's attack power to each enemy it hits. At the same time, the Debt Collector spends 2% of its max. NR. |
 Argenti Argenti | Erudition | Physical | Physical DPS with high area damage. Since it restores energy for each enemy attacked, with the help of advancing the action from the Armor skill it will be able to quickly charge the ultimate. |
 Jing Yuan Jing Yuan | Erudition |  Электрический Электрический | Excellent basic DD. Due to the summoning of the Lord of Lightning, it deals high electric damage in an area. In the later stages of the game, it needs additional support and reinforcement. |
 Serval Serval | Erudition | Электрический | Just like any damage dealer, she needs a lot of attack power and critical damage stats to increase her own DPS. |
 Hertha Hertha | Erudition | Ice | A free character that specializes in dealing frost damage to multiple targets. Becomes stronger if enemies' HP is equal to or lower than 50%. |
 qingque qingque | Erudition | Quantum | With the help of traces, he can increase his speed and add 1 skill point, which, combined with buffs from Armor, increases the potential and strength of Qing Que by several times. |
 Aglaia Aglaia |  Memory Memory | Электрический | Summons the Seamstress to the battlefield - a spirit of memory, which has a personal icon within the action scale, a set of its own active skills, in addition, it can be healed, protected and attacked from the outside. Mainly plays from the superpower: in the "Higher Form" state, it receives wild increases in speed and transforms the basic attack into an enhanced one. In general, it is focused not only on single enemy targets, but is also capable of inflicting mass damage. |
 Pioneer Pioneer | Memory | Ice | Great support even for those characters that do not have the summon mechanic (i.e. spirit of memory): increases the critical damage of allies, advances the action, and also deals additional true-type damage. |
 Hanja Hanja |  Harmony Harmony | Physical | A solid attack power and speed buffer that also restores skill points. Together with Armor, it can support one damage dealer with various bonuses, increasing his DPS many times over. |
 Silver Wolf Silver Wolf |  Nihility Nihility | Quantum | A debuffer that has a unique mechanic that inflicts a vulnerability of the same type as the element of a random ally on one enemy. In addition, it lowers defense, speed and attack power. |
| Nihility | Fiery | It is a debuffer that supports units focused on depleting the durability of enemies. It increases the effect of penetration, allows you to ignore vulnerabilities and reduces the defense of enemies due to the negative status "Fox's Prayer". In addition, it is capable of independently inflicting good damage with its ultimate and enhanced basic attack. | |
 Kafka Kafka | Nihility | Электрический | Kafka's main goal is to inflict the Shock status, as well as "explode" all the enemy's existing statuses with periodic damage (Shock, Bleed, Weather). She doesn't need a crit. damage, but it will be useful to increase the attack power and damage dealt. |
 Black Swan Black Swan | Nihility | Wind | Black Swan, like Stellaronamia Hunter, plays from damage over time, so she doesn't need a critical damage buff. However, it is extremely beneficial for her to increase all DPS, attack power and move the action forward by 100%. |
 Welt Welt | Nihility | Imaginary | Acts as the second support character in the squad. With the help of technique, skill and ult, debuffs enemies, lowering their speed and slowing down actions. |
 Acheron Acheron | Nihility | Электрический | Combines with heroes of the Path of Harmony only at E2. However, Armor, like Sparkle, can partially compensate for the lack of a maximum buff. For this, she highly recommends a signature cone, E1 and from 160 units. speed to drive the action forward on a consistent basis. Without Signa and Eidolon, she can also support Acheron E0, but, unlike Sparkle, rotation becomes much more difficult, which affects efficiency. |
 Jiaoqiu Jiaoqiu | Nihility | Fiery | A powerful representative of the Nothingness, whose skills are aimed at applying the “Hot Ash” weakening (considered the DoT status “Burning”, which causes periodic damage of the fire type). Enemies affected by Burning Ash take increased damage. The superpower, in turn, inflicts a high level of damage and also imposes a third-party debuff that increases the damage taken by opponents from ultimate DPS-type skills. |
 sang sang | Nihility | Ice | Reduces the defense of both individual opponents and groups of enemies with equipment and superpowers, while inflicting ice damage. This skill removes buff from one enemy target. |
 Sampo Sampo | Nihility | Wind | Deals periodic damage by applying the Weathering status. The technique blinds opponents, who stop noticing the actions of their allies. |
 Locha Locha |  Abundance Abundance | Imaginary | Heals when using a skill, as well as passively due to a talent that triggers when an ally makes an attack. Superpower deals area damage. |
 Hoho Hoho | Abundance | Wind | Healer and buffer rolled into one. With skill and talent, heals one or more squad members, restores energy with superpowers and increases attack power. At the same time, it can remove weakening from allies. |
 Linsha Linsha | Abundance | Fiery | A support with a variety of functions: heals, deals area damage and applies a weakening that increases damage from penetration. During combat, summons an assistant, which is a bonus attack. Due to this creature, it additionally heals, deals damage outside of the turn and removes debuffs. |
 Bailu Bailu | Abundance | Электрический | Effectively heals and can resurrect fallen allies. When leveling the "Water Blessing" trail, characters under the influence of Inspiration take 10% less damage. |
 Natasha Natasha | Abundance | Physical | Free alternative. Heals squad members, can remove from their weakening. The technique also deals low damage based on attack power and has a 100% chance to weaken enemies. |
 Lynx Lynx | Abundance | Quantum | An epic healer, not inferior to the legendary representatives of the Path of Abundance. Applies positive effects to passive healing, removes negative statuses from a squad with an ultimate ability, and provides strong mass and solo healing. |
 Gallagher Gallagher | Abundance | Fiery | A healer who is economical in consuming skill points is extremely in demand in teams with Armor. The hero’s healing works from the negative statuses imposed by the ultimate, for hits on which allies can regenerate health. The bartender can also heal with a skill and an enhanced basic attack. |
 Cheetah Cheetah |  Preservation Preservation | Ice | It has one of the lowest speed stats, so in certain situations the action progress buff can be very useful. At the same time, the Cheetah itself provides increased survivability for both the Armor and the entire team. |
 Aventurine Aventurine | Preservation | Imaginary | Places shields and during the battle, renews them after activating a superpower, as well as performing a bonus attack. Virtually no demands on skill points. In addition to providing protective functions, it helps the squad with damage. The ideal squad for a character is the cooperation of several heroes who can perform a bonus attack. In other teams he is just as good, but takes bonus shots a little less often. |
 Fu Xuan Fu Xuan | Preservation | Quantum | By creating the Matrix of Foresight, transfers 65% of the damage received by the team to itself. Can heal and reduce all damage incoming to allies. |
 March 7 March 7 | Preservation | Ice | Places a shield on allies and counterattacks if the character under the shield makes a hit. It can put a Freeze status on the enemy, in which he does not move and takes periodic damage. |
 Pathfinder (Fiery) Pathfinder (Fiery) | Preservation | Fiery | Reduces damage received by squad members, applies shields and takes some of the hits. The super deals fire damage in an area, so it can also take advantage of Armor buffs. |
 Hook Hook |  Destruction Destruction | Fiery | Inflicts the Burning status on selected enemies and nearby targets. Under this effect, her damage increases. |
 Blade Blade | Destruction | Wind | Representative of the Path of Destruction, capable of inflicting crushing blows both on one enemy and on the area. |
 jingliu jingliu | Destruction | Ice | Jingliu needs to gain stacks to enter his special state. Armor will help significantly speed up the process, as it will advance its action forward by 100%, and also increase damage, attack power and crit. damage. |
 Moon Eater Moon Eater | Destruction | Imaginary | A strong DPS character who occupies fairly high positions in tier lists. Needs representatives of the Path of Harmony, whose skills are aimed at spreading increases in significant characteristics for damage dealers. |
 Clara Clara | Destruction | Physical | In a team he can act as the main damage dealer, secondary damage dealer and tank. Deals physical damage in an area, takes hits to reduce damage taken, and counterattacks. |
 Yunli Yunli | Destruction | Physical | Like Clara, she functions as a tank and specializes in conducting counterattacks. Thanks to the negative status, “Taunt” effectively absorbs attacks from opponents. |
 Pathfinder (Physical) Pathfinder (Physical) | Destruction | Physical | A universal fighter, available from the start of the game: deals damage to one or several targets. Subsequently, it must be provided with buffs so that it can cover current combat content. |
 Arlan Arlan | Destruction | Электрический | Increases your damage based on lost health. Needs attack power, since all his abilities scale from this indicator. |
 Misha Misha | Destruction | Ice | An ice damage dealer who can play off basic hits without losing effectiveness. Suitable for both the role of main DD and secondary DPS in a team with an expensive main damage dealer. |
Top Teams
Armor unit options based on the above characters:
| Character 1 | Character 2 | Character 3 | Character 4 | Features |
|---|---|---|---|---|
 Seele Seele |  Armor Armor |  WeltMisha WeltMisha | Hoho | A team aimed at strengthening Zele and weakening enemies. The armor covers two slots of Path of Harmony characters at once, providing all the necessary buffs. Welt reduces the speed of enemies and delays their actions, and can be replaced by the more economical Misha, who freezes enemies and does good damage. Hoho heals, restores energy and increases attack power. |
| Seele | Armor | sang | Fu Xuan | In this case, the emphasis is on reducing the defense of opponents using Pela's abilities. Fu Xuan takes damage upon himself, increasing the team's survivability, and also increases crit. chance and deals quantum damage in an area. |
| Feixiao |  Topaz Topaz Zaryanka Zaryanka | Armor | Linsha Gallagher Gallagher | A team from a bonus attack with Feixiao. You can pair it with Topaz as a sub-DD, which additionally strengthens the bonus attack, or Zaryanka, which provides many useful buffs. The armor is aimed at constantly strengthening Feixiao and promoting its action. For the role of a healer, heroes are recommended who are able to not only heal, but also damage. |
| jingliu | Armor |  sang sang | Locha | In such a squad, Jingliu will be able to easily gain 2 levels of status in order to enter the state of Spectral Transmigration and stay in it for as long as possible. Locha will make sure that allies remain alive and well. |
 Devour. Moon Devour. Moon | Armor |  tingyun tingyun | Locha | One of the strongest units of the Moon Eater. He receives a large number of buffs from Armor (E1 and signature are desirable) and Tingyun. Locha heals while spending virtually no skill points, which the Devourer desperately needs to use an enhanced basic attack. Tingyun can be replaced by Yukun or Pelageya. |
| Kafka |  Armor Armor | Black Swan Sampo Sampo Guinaifen Guinaifen | Hoho | Squad with Kafka from periodic damage. Kafka directly applies Shock status, and Black Swan/Sampo/Guinaifen Weathering or Burning, which Stellaron Hunter subsequently uses to deal explosive damage. Armor buffs attack power and propels the action forward. Hoho heals and provides additional buffs. |
| Blade | Armor |  Yukong Yukong | Locha | A powerful squad where selected representatives of the Path of Harmony impose various positive effects on Blade, who acts as the main DPS character. Locha helps extra. damage, and is also able to passively restore the HP of allies. |
| Argenti | Armor | Hanja Luke Luke | Hero Paths of Abundance | A team with the main damage dealer Argenti. With the support of Armor, he easily deals with numerous groups of enemies. An additional buffer, debuffer or sub-dd is placed in the third slot. For example, Luke removes buffs, deals damage through Bleeds, and does good damage to a single target. |
| Boothill | Armor |  Imaginary. hero Imaginary. hero ruan mei ruan mei | LinshaGallagher | A squad from penetration with Boothill or Rappa. They specialize in destroying enemies, in which they are assisted by supports. Armor advances the action so that main DDs can move more often and, as a result, more actively damage and charge the ultimate, and Ruan Mei / Pathfinder / Fugue increase the effect of penetration. Linsha / Gallagher restore health to allies and additionally buff damage after penetration. |
| Seele | Armor | Jing YuanMisha | Cheetah | Zele is the main damage dealer. Armor is a buffer. Jin Yuan/Misha, due to attacks on several targets, allows the squad not to suffer in terms of DPS. The Cheetah applies shields to all allies, and also has a chance to freeze opponents who will not be able to perform actions. |
Jing Yuan Serval Serval | Armor |  Tribby Tribby tingyun tingyun | Fu Xuan | Armor and Tribby/Tingyun enhance the main DD with buffs from skills and super abilities. As damage dealers, you can consider both Erudite characters, for example, Jing Yuan and Serval for the battle against those with electrical vulnerability, and other attacking heroes of the Path of the Hunt and Destruction. |
 Blade Blade | Armor | Silver Wolf | HohoLynx | Thanks to the Silver Wolf skill, it becomes possible to create a squad that focuses on a specific element. In this case, the enemy may receive a weakness to the quantum or wind element. |
 Himeko Himeko Hook Hook | Armor |  Asta Asta |  Bailu Bailu | Himeko/Hook is the main DPS character. Asta helps by dealing additional damage, increasing attack power, speed and fire damage. The armor additionally buffs allies and advances the action of one of the team members forward - depending on the situation on the battlefield. |
| Yanqing | Armor | Misha |  CheetahAventurine CheetahAventurine | Freeze Squad. Yanqing and Misha are the main DDs that Armor buffs. Depending on the situation, one of the characters takes the leading position, and the other acts as an additional source of damage. For example, Yanqing will perform better in battles against bosses, so in this case it is better to apply buffs to him. |
| YunliClara | Armor | TribbyArlan | March 7 | Yunli or Clara deal damage, counterattack, and take most of the hits themselves. They are helped by Marth 7, who applies a shield with a skill. Arlan is a secondary DD with damage to single and multiple targets. You can also place Tribby in his position, which, together with Armor, will increase the overall power of the entire squad. |
| Acheron | Armor | sang | Gallagher | A team with Acheron E2, which allows you to take only 1 character of the Path of Nothingness to get max. bonus from the “Abyss” trail. Armor advances its action forward by 100%, and also provides an increase in crit. damage and attack power. Pela weakens enemies, helping to gain points of Shattered Dream and stacks of Crimson Knot. Gallagher heals and debuffs with his ultimate. The build can also be used with Acheron E0, if the Armor has E1, a signature light cone and speed of 160 units or more to compensate for the absence of the 2nd ally of Nothingness. |
| Greater Hertha |  Jasper Jasper Hertha Hertha | Armor | Linsha | A team with Great Gerta that needs another Erudite character, as it significantly strengthens not only her, but the rest of the squad. The optimal addition to such a build would be a buffer/debuffer that spreads beneficial effects or weakens enemies. It is also worth noting that the legendary Hertha values allies who can attack frequently and thus accumulate stacks of Interpretation, which means that similar units can be considered for the remaining support positions. For example, Linsha not only heals well, but also actively deals damage with a bonus attack. |
Examples of F2P teams with free and epic heroes:
| Character 1 | Character 2 | Character 3 | Character 4 | Features |
|---|---|---|---|---|
 Dan Heng Dan Heng | Armor | Arlan Hertha Hertha |  Natasha Natasha | A team with Dan Heng as the main damage dealer who attacks the toughest enemy or boss. Armor increases his attack, crit. damage and advances the action. Arlan/Gerta specialize in dealing extra damage. Natasha is a healer. |
 Sushan Sushan LukeHook LukeHook | Armor | Asta Tingyun Tingyun | fire hero | Sushan, Luka or Hook act as the main damage dealers that deal most of the damage. Another Path of Harmony character is added to the Armor for additional buffs, such as Asta or Tingyun. Fiery Pathfinder tanks and applies shields. |
| ServalqingqueSampo | Armor | YukongHanja | Lynx | Serval, Qingque and Sampo are focused on destroying their opponents. Bronya, as well as Yukun or Hanya, help them in this. Yukun is useful for a crit buff. chance, and Hanya - to restore skill points (especially important in the case of Qingque). Lynx is a healer. |
| Dan Heng | Armor |  Phys. hero Phys. hero | March 7 | The armor will also fit well into a starting story team, significantly increasing the power of each team member. Despite the fact that the squad is budget-friendly and available from the beginning of the game, it can remain relevant for a long time. |
How to play Armor

Armor adheres to the Path of Harmony and specializes in enhancing the team's power through superpowers, skills, and techniques. At the same time, thanks to the mechanics of the first trace, “Order” receives a 100% critical chance. hits for a basic attack, so if necessary, it can deal good damage from the hand.
Action bars should be organically distributed among all members of the squad. However, Armor without a light cone and the first eidolon will not be able to permanently activate abilities without taking points from the main damage dealer or other supports. Therefore, take into account the strength of the opponents and the situation on the battlefield - in what situation can buffs be neglected so as not to slow down the pace of the battle and give the rest of the characters an opportunity to use their skills.
Rotation
As part of a turn-based battle, each battle requires an individual approach, but there are general recommendations for building an Armor rotation:
- At the beginning of the battle, use the technique "Under the Banner of Command", so that all allies instantly receive a bonus 15% attack power for 2 turns.
- Apply the skill "Combat redeployment" on the character who deals the main damage in the squad or other allies if they have some kind of weakening/you need to advance their action to make an additional move.
- If there are few skill points left (1-2), you can perform a basic attack instead of a skill to restore points and advance your action. This is also advisable in cases where it is necessary to finish off an enemy, break through a vulnerability, or simply reduce his HP.
- Superpower"March of Belobog» Activate as energy accumulates. Remember that you don’t have to wait for your turn to do this, so you can and should use the ultimate as soon as it is restored.
Conclusion on the character

The armor in HSR is a universal buffer for the Path of Harmony, which with its presence alone completely covers the squad’s need for reinforcements, giving everything they need. If necessary, it can help in dealing damage and even serve as an additional source of DPS due to the mechanics of the Order trail and the fourth eidolon.
The character is not picky about equipment and copes well with his tasks even with an epic cone. However, if you have a signature weapon and the first eidolon, it reveals itself even better by solving its main problem - the lack of skill points to continuously maintain buffs. In any case, if you need to increase the power of your squad to defeat a powerful enemy, Commander Silvermane is an excellent candidate for this role.
We hope our guide helped you put together the best Armor build. In the comments, ask any questions about the character so that the author or other players can help. Follow useful articles on the game in the relevant sections of our website: passing, guides, builds.
Achievements with Armor

There are two achievements associated with the heroine:
- And you, Bronya? - Use Armor to deliver the final blow and defeat Kokoliya. Reward: star jade ×5.
- When the anthem plays - Use Belobog's Armor March 1 time during the battle with cheetah, Cocolia and Armor. Reward: star jade ×5.
Questions and answers about Armor
How to get Armor in Honkai: Star Rail?
You can get Armor in the permanent “Star Jump” banner or in the newbie “Starting Jump” banner for 50 spins. For making 300 spins in a standard banner you can get a free one. Also with some chance it will drop from the event banner “Event Jump: Character” if you lose 50/50.
What are the main skills of Armor?
Armor skills are aimed at buffing allies. Increases attack power, critical damage, removes debuffs and gives extra turns by promoting the action.
What active skills does Armor have?
“Under the banner of command” technique, “Bullet flying in the wind” basic attack, “Combat redeployment” skill, “Belobog’s March” super ability.
What is the order of leveling the abilities of the Armor?
Superpower ≥ Skill > Talent > Basic Attack.
What are the best Eidolons for Armor?
The best Armor eidolons are E1, E2 and E4.
How many resources do you need to upgrade Armor?
4 credits; 688 traveler's guides; 500 adventure logs; 289 travel meetings; 6 Silvermane Guard badges; 16 Silvermane Guard insignia; 56 medals of the Silvermaned Guardians; 71 harmonious melodies; 73 songs of the kind; 18 symphonies of constellations; 69 eyes of the storm; 139 imprints of fate; 65 guardian sorrows.
What is the Armor's signature cone?
Signa Armor - The battle is not over.
What is the best light cone for Armor?
The battle is not over, Cut the moon and cut the clouds, Past and future, Dance! Dance! Dance!, Date with the Stars, Memories of the Past.
What are the best relics for Armor?
Cave Relics: Hackerspace Herald, Wildwheat Marksman, Twilight Reach Eagle. Planar Ornaments: Broken Keel, Ageless Fleet, Living Vonvak, Penakonia Dreamland, Mermaid, Drowned Shores.
What are the best characters for Armor?
Seele, Yanqing, Sushan, Dan Heng, Himeko, Blade, Moon Eater, Hook, Clara, Yunli, Arlan, Great Hertha, Rappa, Jing Yuan, Argenti, Serval, Hertha, Qingque, Tingyun, Asta, Hanya, Yukun, Silver Wolf, Fugue, Welt, Kafka, Black Swan, Pela, Sampo, Luca, Bailu, Natasha, Lynx, Cheetah, March 7, Fu Xuan, Trailblazer (Fire, Physical).