
Chaos Trial in Path of Exile 2 — an activity in which you will have to challenge the Master of Trials and go through several difficult maps, fulfilling certain conditions and killing the final boss. For completing each of the rooms, you will receive a reward, which can only be received at the very end. Go to the Temple of Chaos, test your character's strength and defeat the Master of Trials.
In this guide we will tell you how to pass the test in the Temple of Chaos in PoE 2, which debuffs are best to choose for the rooms and how to deal with the final boss.
What does the Chaos trial give?
Like any activity in the game, Chaos Challenge comes with rewards. The cheapest you can get is random corrupted items equipment. The affixes on them are randomly placed, and they cannot be improved, so the value of these things for the account is usually minimal. Also, quite expensive ones often drop here as rewards soul cores, and defeating the final boss can bring a very expensive unique item.
One of the most important rewards of the Chaos Trial in the early stages is 2 Ascension points to upgrade your hero's subclass. Completing the first four halls in Act 3 of the story campaign guarantees the opportunity to receive and invest points in obtaining the Ascension passive Class.
Where is the Chaos Trial in Path of Exile 2


To get to the Temple of Chaos, you need to go through 3 Act story campaign to location Marshes of the Himerides. Carefully explore the entire available map and do not miss the entrance to the sanctuary.

After opening the portal inside the temple, you can return to it at any time using the button to the right of the map in the teleportation menu.

You can get into the temple at any time, but access to the trials themselves is only open if make an offering. Once you enter and go a little deeper, you will find a statue. Interact with it and place the written Ultimatumto take part in the Master's trials.
Where to find the inscribed Ultimatum

For the first time, you can find an item for entering the test halls in the same location - Marshes of the Himerides. During the quest "Legacy of Vaal" at some point you will need to find the entrance to Machinarium Jikwani, which is guarded by a giant Chimera Shyklusian. Defeat the boss, from which you will receive the first medallion for the Temple of Chaos. As soon as it gets into the inventory, the quest will start, the main task of which is to find a use for the Inscribed Ultimatum.
In a separate article we discussed this in more detail, how to find the Jiquani Machinarium and defeat the Shyklusian Chimera.
How to Pass Chaos Trial in PoE 2
The Chaos Trial is a set of rooms with different tasks. Depending on the level of the Ultimatum statue, there can be 4, 7 or 10 of them. You can move on to the next one only after the previous one has been fully completed. The largest trial is divided into 3 stages, at the end of each of which a fight with a boss awaits.
How to Prepare for the Ultimatum
Here are some tips to help make the Chaos Trial battles easier:
- Try to collect as many resistances as possible.. Ideally, get the maximum (75%) for each of the four stats: Fire, Lightning, Cold, and Chaos.
- Don't Ignore the Armor Value, even if you play exclusively through intelligence or agility. High stats will help significantly reduce incoming physical damage and avoid bleeding.
- Get boots that increase movement speedThe distances between the halls are quite large, which is why passing the tests can take a long time.
Which debuffs to choose

Before entering the first hall, approach the Test Master and select a property in the special window next to him. A total of 3 random negative effects, making it more difficult to complete subsequent halls. Such debuffs must be selected before each test, and they will remain until the complete completion. If you complete 4 halls, there will be 4 negative effects during the battle with the boss.
You should choose debuffs based on the current situation and existing negative effects. Evaluate each of the proposed complications and take the one that is least harmful to the character. It is difficult to recommend anything specific here, because each class and build has its own weaknesses.
Try to collect as much as possible less damaging effects on the field, so that in the later rooms you don't have to constantly dodge beams, exploding rings on the ground, turrets, etc. Also, under no circumstances should you choose debuffs that strengthen mobs, especially if you feel that they are already difficult to deal with.
Best debuffs:
- Reduced resistance — the first level weakening reduces the character's resistances by only 15% and subtracts 10% from the maximum. You should not take this debuff again, as the resistances will decrease even more, which can be very painful.
- Time Paradox - after taking this weakening, it is worth constantly keeping in mind that all positive effects will disappear 3 times faster, and negative ones will remain on the character 3 times longer.
- Shock and Incendiary Turrets — are not so scary, since their projectiles fly quite slowly, and in the presence of appropriate resistance they pose practically no threat.
- Chaotic monsters - The extra 20% chaos damage from mobs can be survivable, especially if you have enough resistance.
- Merciless Rare Monsters — is even a useful debuff in some ways, as it increases the number of rare monsters from which you can try to get good loot by 30%. A minor drawback here is the addition of two additional properties to such enemies.
Other weakenings can have a more negative impact on the passage and should be chosen at your own discretion. Among them are the most unpleasant. For example, creeping shadow or pyramidal rays, forcing you to constantly closely monitor what is happening on the screen.
Types of trials in the Temple of Chaos
During your progress through the halls of the Temple of Chaos, you may encounter 5 different challenge rooms, not counting the boss rooms.
Defeat all the monsters

Simply clear the location of all monsters, after which the passage to the next room will be unlocked. Convenience is added by the fact that each of the mobs is marked with a red dot on the mini-map. On high difficulty, do not rush, so as not to aggro all the monsters at once.
Survive until the timer runs out

Go down to the arena and activate the Desecration Bridge in the center. Immediately after that, a timer will start counting down 1 minute 30 seconds, which you will have to hold out against the attacking waves of enemies.
It is not necessary to kill all the enemies, you just need to hold out for the allotted time. If the battle with monsters seems too difficult, you can hide in the corner of the map and wait for the timer to expire, killing only the monsters that come close. Unlike Sekhem trials here the timer is not cut off for killing rare enemies.
Sacrifice the monsters

There are 3 circles in the arena, inside which you have to kill a certain number of enemies. Lure and sacrifice monsters at the altars inside the bloody circles.
Escort the statue

A test that takes quite a long time. To start the escort, stand close to the statue and move with it, fighting off attacking enemies. Move away from the statue only if the character is in danger, the rest of the time it is better to stay close to pass the hall as quickly as possible.
The statue's speed is quite low and the radius of interaction with it is very small, so it may take several minutes to follow it from start to finish.
Collect all Soul Cores

Perhaps the most unpleasant of the tests. Here you have to collect on the location 3 soul cores and place them in the slots on the altars. Enemies will spawn continuously until all 3 altars are activated. The testing arena may be multi-level, with closed passages that can be opened using levers.
The main difficulty is that it is impossible to cancel the animation of interaction with mechanisms and placing the soul core in the slot, which is why it is easy to receive fatal damage. In addition, the soul core on the character's back will constantly inflict increasing physical damage until it is placed on the altar.
Defeat the boss

During the passage of ten halls with trials, you will encounter 3 rooms with different bosses. Strong monsters will be encountered in 4, 7 и 10 rooms. It is unknown which boss will appear in which room, their order is always different. Even when going through a low-level Chaos trial, you should be prepared to meet each of them.
How to beat Chaos Trial bosses in PoE 2
The bosses in the Temple of Chaos are very different from each other and require different approaches. Before you begin the trials, make sure you are prepared to fight them. If you lose at any stage, you will lose all accumulated rewards, as well as the contributed Inscribed Ultimatum.
Bahlak the Skyseer

The Sky Seer Bahlak is a huge bird-like creature that has Lightning resistance и vulnerability to fire. Deals physical and electrical damage, so preparing for a boss fight is not that difficult. It is enough to increase these two resistances and have enough damage for a quick victory. To easily gain the upper hand, follow these tips:
- Try to avoid an attack during which the creature suddenly flies up и falls on the character's head. After making such a move, the bird deals large physical damage in a small area around itself. Change your position at the moment when the boss disappears from sight - characteristic audiovisual markers will help you navigate the timing of the dodge.
- Another surprise attack that can catch a monster off guard is a sharp lunge forward with a somersault in the air. To avoid damage in this case, you need to catch the timing and run to the side at the moment when the creature is about to make a dash. Watch for sound and visual markers to dodge in time: before the attack, a characteristic sound is heard, and the monster is momentarily enveloped red glow.
- Sometimes Bahlak will create giant whirlwind, rapidly pursuing the character. At these moments, just run around the arena, trying not to get into the tornado, so as not to receive powerful physical damage. While the whirlwind is on the field, the boss cannot be damaged, so just focus on dodging.
- Most of the time, the creature will try to perform normal physical attacks or cast lightning. It does not do much damage and is quite easy to dodge. It is ideal if during the fight with Bakhlak the character has tall armor rating и lightning resistance.
- If you keep your distance from the boss, he may commit ranged attack with feathers. Before this, the creature covers itself with its wing, then flaps it sharply, scattering sharp feathers that stick into the ground. Nothing special, since it doesn't do much damage and can be easily dodged.
The main difficulty of this fight is the large number of attacks of the boss, among which there are very unpleasant and causing great damage. Knowing how to act and dodge, you can quickly get used to all his movements and easily defeat.
Uxmal the Beastlord

The boss is a one-to-one copy of the design and moveset of the creature guarding the entrance to the Jiquani Machinarium. The Chimera is endowed with all types of elemental damage and can additionally attack with chaos, poisoning the character. The fight is stretched out due to the large three-level arena, where you will periodically have to run after the creature. To easily defeat the chimera, follow the tips:
- Increase your resistance to elements to the maximum possible indicators - this will help you easily survive most of the boss's attacks.
- The monster is capable of covering most of the arena. one of four effects: icing, burning ground, electrified ground and toxic puddles. Stay away from the affected area to avoid getting unpleasant negative effects. This is especially true for frozen ground, as being in it not only causes damage, but also greatly slows down the character. At the same time, icing does not go away over time and remains in the arena until the end of the battle.
- After taking a certain amount of damage, Uxmal will fly up and will move to the next tierTo continue the fight, you must first find the creature.
- To perform some attacks, the boss flies into the air and at these moments becomes invulnerable. This happens, for example, when a chimera flies after a character, pouring flames on the ground. Just dodge the attacks and wait until the monster is on the ground again.
- If you didn't manage to finish off the monster on the 3rd level of the location, it will fly back to the very bottom and you will have to run after it along the stairs.
Otherwise, the battle cannot be called very difficult, it just drags on because of the constant running after the boss. Another drawback is the lack of any elemental weaknesses in the chimera and the presence of resistance to each of the elements. In general, it does not matter what you attack the boss with. A little more effective may be physical attacks и poisoning.
Chetza the Feathered Plague

The Scourge of the Sky is another bird-like monster that has the ability to summon a minion to fight on its side, preventing you from focusing your damage on the main boss. Here are some battle tips to help you defeat it easily:
- Basically the monster deals damage physical damage, so the best defense against it is the maximum possible armor increase or evasion.
- One of the most annoying attacks of the boss is Spiral of spikes, which cripples the character and slows him down considerably. It is easy to predict by the monster's special movement, when he sticks his head into the ground, after which spikes slightly emerge from the ground. At this point, it is important to move to a part of the location free of them, since soon the spikes will suddenly jump out of the ground, causing damage.
- The bird likes to attack over an area using different sizes bloody shells, falling from the sky and splashing out damaging puddles. To avoid these attacks, keep moving.
- In melee combat, the Scourge of the Sky will attempt to deal normal and heavy damage. beak strikes. Nothing special, just dodge them with a roll. After hitting the ground with the beak, a large puddle of bloody goo may appear - try to stay away from the epicenter.
- The most dangerous attack of the monster is rain of birds, which can easily cause you to lose all your health. To avoid damage, start moving in a circle at this point. It is important to have enough speed and not be under the slowing effect of "crippling" caused by the spikes. Alternatively, you can use Silver amulet, which will help avoid the slow debuff.
- After losing the first 25% of health, the bird will call minion Plagueling. You don't need to pay attention to him, because after killing him, the boss will create another one. Just concentrate on damaging the main enemy.
To defeat the monster more easily, use fiery or poisoning skills. Try not to attack him with cold, as the bird has resistance to it.
How to pass the Challenge Master challenge in PoE 2

After killing the third boss in the tenth hall, you will be able to open a passage to the battle with the Master of Trials himself. At this stage, you can simply take the rewards and leave the Temple of Chaos, or take a risk and challenge the final boss. The passage to him is located to the right of the Ascension Altar. In the wall you can see a door with a recess where you will need to insert special items.
The Trial Master's Tower that appears at the end requires an offering to enter. If you easily dealt with all the halls and want to increase your reward by getting one of the unique items that drop from a strong enemy, insert three destinies, to open the door to the Trial Master.
Where to get 3 destinies

Destiny is one of three parts of the key needed to gain access to the Master's Tower. One of the longest ways to get all the fragments is to complete the ten challenge rooms at least three times. Each time you kill a boss in the final room, you will receive one of three destinies, depending on the monster you killed:
- Bahlak will leave behind Deadly end.
- for the victory over Uxmal will fall out A cowardly end.
- Chetza after death will drop Victorious end.
It is worth considering that the bosses are distributed randomly throughout the trial, which makes it impossible to predict which fate you will receive at the end.

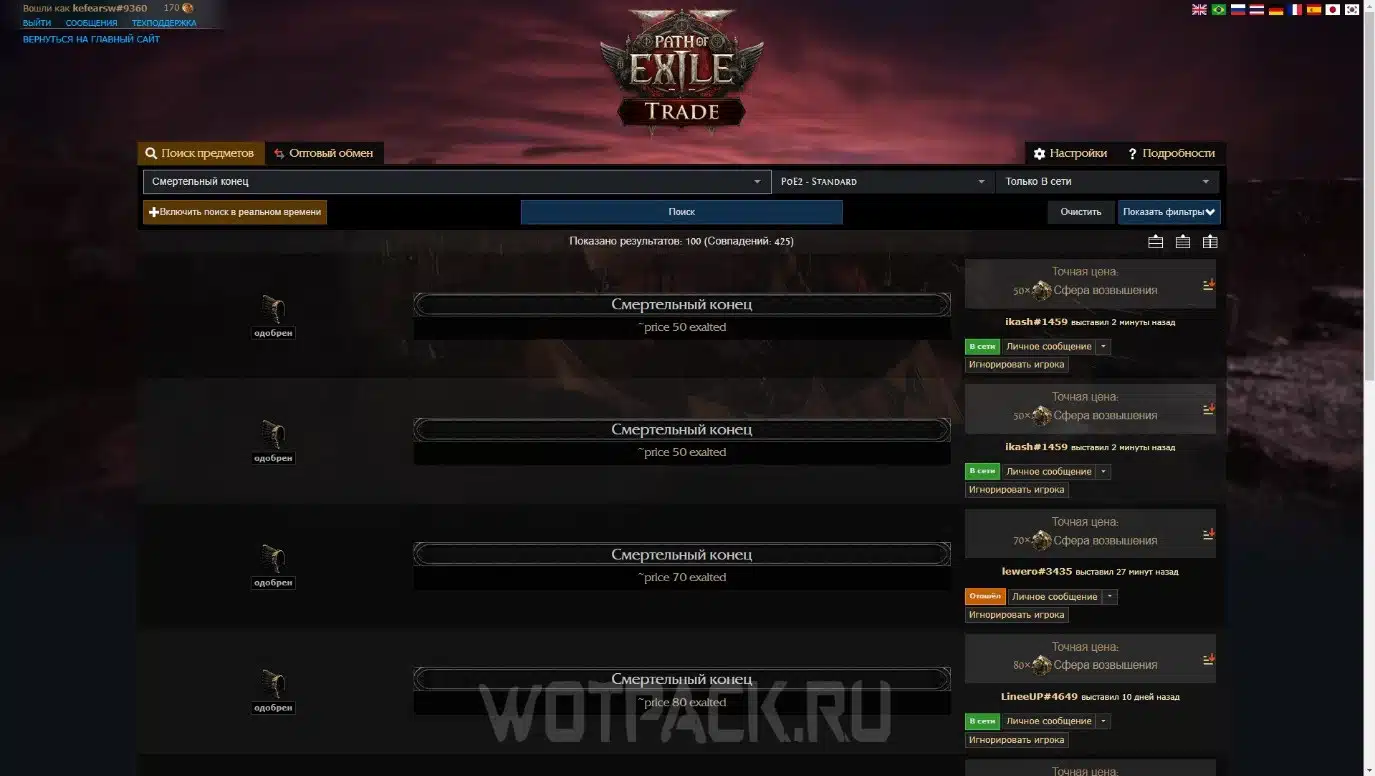
An easier way to get all 3 parts of the passage is to buy them at trading platform or through currency exchange with NPC gamblers (Finn, Risu, Alva). The cost of different parts may vary and reach 100 exaltation spheres and higher. On average, one pass on the Master of Trials costs half of the Divine sphere. It is best to invest them in a boss fight only if you are absolutely sure of victory. Otherwise, it is better to leave them for later or sell them on the marketplace.
How to defeat the Trial Master

The Trialmaster is a very difficult boss, with whom you always need to be on guard. He has a large set of different attacks that can instantly kill the character. At the same time, the Master is endowed with a huge amount of health, so the fight with him will drag on in any case. The enemy attacks with all types of elements, which is why it is important to fight him collect maximum resistanceBelow is a list of all the boss's main attacks and tips on how to dodge them:
- The master does a series of quick spear strikes, creating bloody projectiles. This attack does not deal much damage and can be easily dodged.

- Boss periodically thrusts a spear into the ground, creating an area around himself that deals heavy damage. It's important to stay out of his attack range at this point.
- Sometimes strikes the ground with a spear, creating a triangular area with spikes in front of him, each of which deals separate damage. If you hesitate at this point and get hit, you will most likely have to go to the entrance to the Temple of Chaos. If you react in time, then avoiding damage will not be difficult, simply rolling to the side.
- Sometimes the boss throws a spear into the character, stabbing him into the ground. At this point, it is best to move as far away from the Master's weapon as possible and try to keep your distance. A pulsating area will spread around the spear, causing damage. This attack greatly limits freedom of movement in an already small arena. It is best to stay near one of the walls at the moment of the throw, so that the spear lands on the edge of the arena and most of the damaging area remains outside the location, there will be more space for the battle.
- Left without a weapon, the Master can start throwing balls of all elementsThere is no point in focusing on this attack, since it is very easy to dodge by simply moving around the arena.
- Trialmaster without a spear can call the heart, which will bind the character to itself upon contact. If you try to break the connection by leaving the area of effect, you will be stunned for a while. If you remain in the area of effect, you will eventually take damage from the heart explosion. The only sure way to avoid damage here is to not approach the heart at all.
- The Master of Trials' most dangerous attack has two different forms, but the essence is the same. The boss at some point stops time and makes 3 hits around the character, leaving peculiar marks by which you can determine the direction of attacks. As soon as the time starts, run away to where none of the marks are directed to stay safe. He can attack with blood balls or spikes from the ground.


Rewards for completing trials in the Temple of Chaos

After defeating the Trial Master, you will receive a set of random loot, which will definitely include one of the unique items:
- Shield of Machination of Mahuxotl - one of the most expensive items in the rewards for the trial.
- Helmet Chaos Gaze - an unremarkable cheap unique.
- Gloves Forge of Hate - is also a very cheap item.
- Zerphi's Genesis Belt - another inexpensive unique one.
- Diamond Former Shine — that's what many people go to the Temple of Chaos for. The drop rate for this item is very low, but if you get it with good modifiers, you can instantly become quite rich by the standards of the game.
In addition, during the passage of the halls, 10 random desecrated items will accumulate in the chest with rewards (1 for each hall). You can take them at any time and leave the temple. Among them there may be quite expensive ones soul cores.


When offering to the temple special Inscribed Ultimatum, which requires an additional contribution of some amount of currency, after passing all contributed funds are doubled and given out as a reward.

One of the most important moments in passing the Trial of Chaos is the opportunity to get elevation points. They are given out if you first complete 4 halls, 7 halls, 10 halls and for defeating the Trial Master. You can find out if it is possible to get points from a specific run by reading its description. Ultimatums that give skill points should have the inscription "Completing this Ascension Challenge will grant additional Ascension Skill Points.".
We hope this guide helped you figure out how to complete the Chaos Trial in PoE 2, what debuffs to choose before completing the halls, and how to defeat all the bosses, including the Trial Master himself. If you have any questions about the mechanics, ask them in comments, and also share your experience of passing with other players. Useful guides on the game can be found in relevant section of the website.