
Detailed guide to Tom Genshin impact: the best artifacts, weapons and units to reveal the full potential of the hero. Review of abilities, talents and constellations. Optimal rotation during the battle, as well as everything that Toma needs to level up.
Toma is a playable 4⭐️ spearman who wields Pyro element. In the lore of the game, the Traveler meets the guy for the first time when he arrives in Inazumu, where he introduces himself as the head of the Kamisato clan. Tom is sociable and friendly, making it easy to fit into any environment. At first glance, he may seem frivolous, but in fact he is extremely responsible and serious. When the moment comes to protect the interests of the commission, Yashiro is always ready to show his decisive side.
| Rating | B-position in dash list |
| Rarity | ⭐️⭐️⭐️⭐️ |
| when added to the game | November 2, 2021 (patch 2.3) |
| How to get a character | Character Event Prayers and Standard Prayer |
| Element | Pyro🔥 |
| Weapon | Polearm (spear) |
| Gender of the character | Male |
| To which group does |
|
| constellation name | Red Shield |
| Home region | Mondstadt, Inazuma |
| Birthday | 9 January |
| Zodiac sign | Capricorn |
| Tom's age | 25-27 years |
| Toma's height | 180-185 cm |
| Tom's special dish | "Heat" |
| Voice actors |
|
How to get Toma in Genshin Impact
Tom can be knocked out of any available banners:
- wanderlust is a standard prayer.
- Beginner's Prayer — banner of a new player (no more than 20 spins).
- character event prayer — a limited-time event banner. Toma can appear as a 4-star hero with an increased chance of being obtained. The hero's next appearance is scheduled for the second half of the patch 5.0.
- Deity incarnation - prayer with limited weapons, where with some probability you can get Tom.
For the schedule of the release of new characters and reruns, follow timetable banners.
Toma's stats: what goes up when you ascend
Toma's main stat - Attack Power, which increases with the elevation and pumping of the character. In addition to this, health, base attack and defense indicators increase. The exact values of the characteristics are presented in the table.
| Level of | Base HP | Basic Attack | Basic protection | ATK |
|---|---|---|---|---|
| 1 | 866 | 17 | 63 | 0 |
| 20 | 2225 | 43 | 162 | 0 |
| 40 | 4302 | 84 | 313 | 0 |
| 50 | 5478 | 107 | 398 | 6.0% |
| 60 | 6806 | 133 | 495 | 12.0% |
| 70 | 7981 | 156 | 580 | 12.0% |
| 80 | 9156 | 179 | 665 | 18.0% |
| 90 | 10331 | 202 | 751 | 24.0% |
Touma's abilities
All of Touma's skills deal Pyro damage and also apply shields that block incoming damage and protect allies from being controlled. The main feature of the hero is the "imposition" of shields, which increases the overall strength of the final armor. Next, we will analyze in detail how Toma's skills work and in what order they are best pumped.
Basic skills (active skills)
- Spear of Destruction (Normal/Charged/Drop Attack)
Inflicts up to 4 spear hits when making a normal attack.
When charged, perform a dash that deals damage to enemies in its path. Performing a falling strike, it rapidly flies to the ground, attacking all enemies in its path. Upon landing, deals area damage.
- Burning Shroud (Elemental Skill)
Duration: 8 sec.
Cooldown: 15 sec.
The character strikes in front of him, dealing Pyro damage to enemies, and summons Blazing Shield, which imposes a Pyro status on it:
- The shield absorbs Pyro damage 250% more effectively.
- If another one is cast while Blazing Shield is active, the total shield's durability will stack and the time will be refreshed.
The amount of damage absorbed depends on Toma's maximum HP.
- Crimson Oeroi (Elemental Explosion)
Shield duration: 8 sec.
Duration of Hero of Fire: 15 sec.
Cooldown: 20 sec.
Energy consumption: 80.
Spins the spear and deals AoE damage to Pyro. Also creates oheroy of fire, which during normal attacks of the active character creates Blazing gap, which deals Pyro damage in an area and applies a Blazing Shield. The fiery rupture occurs no more than once per second.
The generated shield is identical to the elemental skill's Burning Shroud, except for the amount of damage absorbed. The maximum damage absorption cannot exceed a certain fraction of the max. HP Volumes. If he dies, then the effect of Herooy of fire disappears.
The order of leveling abilities
First of all, it is recommended to download elemental skillto strengthen the applied shield and increase the unit's survivability. Then priority should be given explosion verses for additional armor strengthening and increased damage dealt. Basic attack can be left at the first level of pumping, since it is practically not used.
Passive skills
| Talent | When does it open | What gives |
|---|---|---|
| free fisherman | Base | If you fish well in Inazuma, there is a 20% chance to get a double catch. |
| Overlapping armor | 2nd Ascension Phase | When your active character gains or renews Blazing Shield, that character's shield is increased by 5% for 6 sec. This effect can occur every 0,3 sec. and fold up to 5 times. |
| Flame Attack | 4nd Ascension Phase | Damage dealt by Crimson Hail's Fire Burst is increased by 2,2% of max. HP Volumes. |
Constellations
Recommended constellations for Toma - С4 и С6:
- The fourth constellation restores energy after using the ult, which allows you to use it more often and play in the position of a burst support.
- The sixth constellation unlocks the full potential of Touma as a support hero, as it gives a good bonus to damage to the entire group, increasing damage from charged, normal or falling attacks squad by 15% when using and updating the Blazing Shield.
| number | Name | <font><font>Materials</font></font> |
|---|---|---|
| 1 | Duty of a friend | When Burning Shield takes damage on any character other than Toma, and reduces the cooldown of Burning Shroud and Toma's Crimson Hail of Fire by 3 seconds. This effect can occur every 20 sec. |
| 2 | Servant's Insight | Extends the duration of an elemental explosion by 3 seconds. |
| 3 | firm determination | Increases elemental explosion level by 3. Max. Lvl: 15 |
| 4 | Long term plan | Using Elemental Burst restores 15% of Touma's energy. |
| 5 | raging fire | Increases elemental skill level by 3. Max. Lvl: 15 |
| 6 | Warm heart | When obtaining or renewing a Burning Shield, the damage of normal attacks, charged attacks and attacks in the fall of all members of the party for 6 sec. increases by 15%. |
Advantages and Disadvantages of Toma

Toma is a good support, however his gameplay requires certain conditions to be met and can be difficult or confusing, especially at first. Let's analyze the key "pluses" and "cons" of the hero.
| Advantages | Disadvantages |
| Imposes a shield that blocks a large amount of incoming damage even without constellations and serious investments. It is enough to collect as much HP and energy recovery as possible. | The long reload time and the high cost of the ultimate (80 units) require either a “battery” (a character of a similar element) or weapons and artifacts with the energy recovery stat to the team. |
| When unlocking its full potential and following the rotation, it becomes the owner of one of the most durable shields in the game. | In order for the shield to be strong and absorb a sufficient amount of damage, it is necessary to constantly update it by combining the skill and the explosion of the elements. To do this, you will have to remember and take into account the rollback time of skills. |
| Can deal damage out of the battlefield with an elemental explosion, which makes the character more functional - he can be both a full support and a sub-dd. | There are not so many teams in which the hero is able to prove himself to the maximum. More often than not, there are easier and more affordable alternatives to use. |
| An ideal support to the squad through the Blossom (Dendro + Hydro + Pyro) due to the standard ICD (2,5 seconds), which provides a stable reaction trigger. | Low damage multipliers on abilities compared to other Pyro DPS. |
| Upon getting C6, it also becomes a buffer that increases the damage of normal, charged and falling attacks of all allies. |
Leveling Toma
In this paragraph, we will consider the materials for Toma, which will be required for the full leveling of the character.
Elevation

To raise Touma to level 80, the following resources are required:
- Shards, fragments, pieces and precious stones of Agnidus agate - dropped from bosses pyro orchid, Pyro Hypostasis, Primo Geovishap, Signora and others. They can also be crafted at the Alchemy Workbench using Nitrogen dust.
- Seals of the Treasure Thieves - Reward for defeating the Treasure Thieves.
- glowing mushrooms is an Inazuma curiosity that can be found in large numbers on Tsurumi Island.
- Smoldering Pearl World Boss Material Pyro hypostasis.
- 420.000 Mora and 421 hero experience.
Genshin Impact Calculator will help you find out the exact amount of resources.
Talents
To raise the level of abilities, we need the books and components indicated in the table:

To pump each active talent of Toma, in addition to the seals of the Treasure Thieves, you need:
- Teachings, instructions, philosophy about "Frailty" - farmed in the dungeon Violet Court в Monday, Thursday and Sunday.
- Hellfire Butterfly - Weekly Boss Material Signora.
- Crown of Insight (Wisdom) at level 10.
- 1.650.000 Mora.
Best builds for Toma in Genshin Impact

Tom's build depends on his role in the team:
- If used as scutellum (full support), in the build it is necessary to focus on pumping health и energy recoveryto ensure a durable shield and its timely renewal.
- If playing in position sub-dd, the main priority is given to the indicator mastery of the elements, since it is Tom who will most often act as a "trigger" for the reaction to occur. Moreover, it is still important energy recovery for a stable application of elemental explosion.
The leader of the Kamisato clan shows himself best in flowering in alliance with Dendro (or in Overdrive with Electro). Although it could well be a reactor through Steam or Melt - in this case, its impact in combat is much lower. However, if you do decide to play through these reactions, in addition to mastery of the elements, crits и Attack Power.
Recommended characteristic values
Let's take a closer look at what main and additional stats you need to look for in artifacts for the best Toma build.
Shield
The table shows a list of characteristics for the support position.
| Artifact | Main characteristic | Additional stats |
|---|---|---|
 Flower of Life Flower of Life | HP (permanent) | Energy Recovery % HP% HP (flat) |
 Feather of Death Feather of Death | Attack Power (Permanent) | Energy Recovery % HP% HP (flat) |
 The sands of Time The sands of Time | HP / Energy Recovery | Energy Recovery % HP% HP (flat) |
 space cup space cup | HP | Energy Recovery % HP% HP (flat) |
 Crown of Mind Crown of Mind | HP / Crit Chance hits (with spear of Favonius) | Energy Recovery % HP% HP (flat) |
Optimal stat values:
- Health: 30.000 HP or more.
- Energy recovery: 220% (before receiving C4) or 190% (after receiving C4).
Sub-dd
Depending on the command staff in which Tom is used as a sub-dd, you can change his assembly as follows:
- If the squad lacks a healer or other defender, you can put more emphasis on HP so that the hero can maintain the survivability of allies and still deal significant damage.
- If you plan to use another healer or shield, prioritize Elemental Mastery to increase DPS when triggering a reaction.
| Artifact | Main characteristic | Additional stats |
|---|---|---|
| Flower of Life | HP (permanent) | Elemental Mastery Energy Recovery % HP% HP (flat) |
| Feather of Death | Attack Power (Permanent) | Elemental Mastery Energy Recovery % HP% HP (flat) |
| The sands of Time | Elemental Mastery / Energy Restoration | Energy Recovery % Elemental Mastery HP% HP (flat) |
| space cup | Elemental Mastery / HP | Energy Recovery % Elemental Mastery HP% HP (flat) |
| Crown of Mind | Elemental Mastery / HP | Energy Recovery % Elemental Mastery HP% HP (flat) |
Optimal stat values:
- HP: 20.000-25.000 HP.
- Energy recovery: 220% (before receiving C4) or 190% (after receiving C4).
- Elemental Mastery: 500-700 units.
Best weapon
Toma's weapons should have certain characteristics and bonuses depending on their role in the team:
- A support shield needs spears for HP and energy recovery.
- For sub-dd - a weapon for mastering the elements and restoring energy.
Shield
If Clan Manager Kamisato is in a support position, the following spears will suit him:
| Name | Description | Recommendation |
|---|---|---|
 Homa's staff Homa's staff⭐️⭐️⭐️⭐️⭐️ Basic attack: 46-608 Critical Damage: 14,4% -66,2%. | Increases HP by 20-40%. Also grants an attack bonus equal to 0,8-1,6% from max. The HP of the character equipped with this weapon. When a hero's health drops below 50%, their attack power is additionally increased by 1-1,8% from his max. HP. | Since there are not so many choices among copies on HP, the Staff of Homa should be considered first of all, as it passively increases the owner's health without any conditions. However, it is recommended to put this weapon only if there are no other carriers. |
 black brush black brush⭐️⭐️⭐️ Basic Attack 38-354 HP 10,2%-46,9% | Increases slime damage by 40-80%. | The only F2P weapon on HP. In terms of resource investment, it is inferior to Homa, but provides a fairly high increase in health. Thanks to this, you can focus on pumping energy recovery. |
 Spear of Favonia Spear of Favonia⭐️⭐️⭐️⭐️ Basic Attack 44-565 Energy recovery 6,7-30,8% | Critical attacks have a 60-100% chance to create elemental particles that restore 6 energy. It can occur once every 12-6 seconds. | Helps restore energy to both the hero himself and allies during a critical hit on opponents. It should be borne in mind that for a more or less stable activation of the passive effect, 40-45% crit is required. chance. |
 Shining harvest Shining harvest⭐️⭐️⭐️⭐️⭐️ Base Damage 46-608 Restore energy 12%-55,1% | Attack power is increased by 28-56% of energy recovery rate over 100%. Max Attack Power Bonus - 80-120%. When activating an Elemental Burst, Energy Recovery is increased by 30-50% for 12 seconds. | For a support Toma, a spear can only offer energy recovery. Takes place as an alternative if there is no one else to supply it. At the same time, in artifacts, the emphasis is on HP. |
 Catch Catch⭐️⭐️⭐️⭐️ Base Damage 42-510 Energy recovery 10%-45,9% | Elemental explosion damage is higher by 32%, and the critical chance for the ultimate is increased by 12%. | HE gives less than Harvest. But it increases the damage from the explosion of the elements, which is relevant not only for sub-DD, but also for full support, since the ult in any case deals damage outside the battlefield. |
 Prototype: Starlight Prototype: Starlight⭐️⭐️⭐️⭐️ Basic Attack 42-510 Restore energy 10-45,9% | Using an elemental skill increases the damage of a normal or charged attack by 8-16% for 12 seconds. The effect can stack up to 2 times. | A free crafting spear that can be crafted at the blacksmith if there are no other options. The passive effect on the character is completely useless, since he does not use regular and charged attacks. |
 Skyward Spine ⭐️⭐️⭐️⭐️⭐️ Basic attack: 48-674 Restore energy: 8%-36,8% | Increases crit chance. hitting 8%-16% and normal attack speed by 12%. On hit with a normal or charged attack, there is a 50% chance to activate an intangible blade that deals 40%-100% damage in a small radius. Can occur every 2 sec. | The spear is in the very last position due to the fact that in the main stat it gives the least energy recovery, while the passive effect is also in most cases not applied in the support position. |
Sub-dd
To trigger reactions and deal more damage, we recommend using the following weapons:
| Name | Description | Recommendation |
|---|---|---|
 Kitain Cross Spear Kitain Cross Spear⭐️⭐️⭐️⭐️ Basic Attack 44–565 Elemental Mastery 24–110 | Elemental skill damage is increased by 6-12%. Successfully attacking an enemy with an E-tail will lose 3 energy, but restore 3-5 energy every 2 seconds for 6 seconds. The effect does not trigger more than once every 10 seconds, even when the character is not on the field. | The best spear for Toma through the Blossom reaction. In the main stat, he has elemental mastery, which directly affects DPS, and due to the passive effect, it helps to restore energy faster, which simplifies the selection of characteristics. When using this weapon, try to activate the elemental explosion before the skill. |
 Storm of dragons Storm of dragons ⭐️⭐️⭐️⭐️ Basic Attack 41-454 Elemental Mastery 48-221 | Increases by 20-36% damage against enemies affected by Hydro or Pyro elements. | The spear with the highest Elemental Mastery bonus. However, the passive effect does not increase the damage dealt by the Blossom reaction. In addition, it will be necessary to collect more energy recovery for the stable operation of the elemental explosion. |
 piercing the moon piercing the moon⭐️⭐️⭐️⭐️ Basic Attack 44–565 Elemental Mastery 24–110 | Reactions with Dendro creates a Revive Leaf next to the character that lasts 10 seconds. Leaf increases the attack power of the hero who picks it up by 16-32% for 12 seconds. Any character from the squad can take the Revive Sheet. The effect does not trigger more than once every 1 seconds. | The weapon allows you to provide additional support to the team, leaving a Leaf that increases the attack power of whoever picks it up. Despite the fact that in the same composition through Bloom this bonus will be of little use, it is in any case a good alternative that can be obtained for free. |
| Shining harvest ⭐️⭐️⭐️⭐️⭐️ Base Damage 46-608 Restore energy 12%-55,1% | Attack power is increased by 28-56% of energy recovery rate over 100%. Max Attack Power Bonus - 80-120%. When activating an Elemental Burst, Energy Recovery is increased by 30-50% for 12 seconds. | Harvest does not affect Dendro's reaction damage in any way, but greatly increases energy recovery. In this case, in artifacts, priority should be given to the mastery of the elements, so as not to sag in damage. However, if Toma is playing through Steam or Melt, the attack becomes more relevant. |
| Catch ⭐️⭐️⭐️⭐️ Base Damage 42-510 Energy recovery 10%-45,9% | Elemental explosion damage is higher by 32%, and the critical chance for the ultimate is increased by 12%. | The situation is similar to the previous spear. Although the overall increase in energy recovery is lower, there is a bonus to elemental explosion damage, which will also be useful for Touma in the position of a secondary damage dealer. |
Skyward Spine ⭐️⭐️⭐️⭐️⭐️ Basic attack: 48-674 Restore energy: 8%-36,8% | Increases crit chance. hitting 8%-16% and normal attack speed by 12%. On hit with a normal or charged attack, there is a 50% chance to activate an intangible blade that deals 40%-100% damage in a small radius. Can occur every 2 sec. | A good weapon with a high rate of energy recovery. The only and most basic disadvantage is that the passive will most often not be used if Toma leaves the battlefield. |
| Spear of Favonia ⭐️⭐️⭐️⭐️ Basic Attack 44-565 Energy recovery 6,7-30,8% | Critical attacks have a 60-100% chance to create elemental particles that restore 6 energy. It can occur once every 12-6 seconds. | If the previously listed spears are not available, Favonius can be used (for the passive to work, it is desirable to have 40-45% KS and above). Although the weapon is more suitable for the position of a support, and not a sub-DD. |
 Missive Windspear' Message Missive Windspear' Message⭐️⭐️⭐️⭐️ Basic Attack 42-510 ATK 9%-41,4% | Within 10 sec. after activating the elemental reaction, the attack power will increase by 12-24%, mastery of the elements - on 48-96 units. | Another free alternative for the event (not currently available). Provides, albeit a small, but still an increase to the mastery of the elements. However, this will require calling any reaction once every 10 seconds. |
Best Artifacts
Artifacts for Toma are selected in the same way, based on what role he occupies in the squad.
Shield
For Toma in the support position, you can put the following artifacts:
| Name | Effects | Recommendation |
|---|---|---|
 Noblesse Oblige ⭐️⭐️⭐️⭐️ ⭐️⭐️⭐️⭐️⭐️ | 2 parts: Increases elemental explosion damage by 20%. 4 parts: Activating an elemental explosion increases the attack power of all party members by 20% for 12 seconds. The effect does not stack. | Universal set for any support. The 4-piece set gives a good attack bonus to the whole team, while the 2-piece set will increase the damage dealt by Firebreak when the ultimate is activated. |
 Millelite durability Millelite durability Emblem of Severed Fate Emblem of Severed Fate | 2 parts: Increases HP by 20%. 2 parts: Increases energy recovery rate by 20%. | The optimal combination that will provide the character with all the main characteristics. Although not directly beneficial to the unit, it can be used as an alternative. |
| Emblem of Severed Fate ⭐️⭐️⭐️⭐️ ⭐️⭐️⭐️⭐️⭐️ | 2 parts: Increases energy recovery rate by 20%. 4 parts: Increases elemental explosion damage by an amount equal to 25% of the amount of energy regeneration. | A full set will allow you to deal additional damage with an elemental explosion. Although it is worth noting that he is more suitable for a DPS-oriented Toma, since damage is not significant for a support. |
Sub-dd
For Toma in the position of secondary dd, it is recommended to use the following artifacts:
| Name | Effects | Recommendation |
|---|---|---|
| Emblem of Severed Fate ⭐️⭐️⭐️⭐️ ⭐️⭐️⭐️⭐️⭐️ | 2 parts: Increases energy recovery rate by 20%. 4 parts: Increases elemental explosion damage by an amount equal to 25% of the amount of energy regeneration. | An excellent set that increases energy recovery and damage caused by the ult, which is extremely necessary for the character as a pocket damage dealer. Since the set farms on many characters, if there are extra pieces available, you can put them on Tom. |
 Paradise lost flower Paradise lost flower⭐️⭐️⭐️⭐️ ⭐️⭐️⭐️⭐️⭐️ | 2 parts: Increases Elemental Mastery by 80. 4 parts: Increases the damage dealt by Budding, Vegetation, and Bloom by 40% on the character equipped with this set. If the carrier causes these reactions on its own, the effect will increase by another 25%. Each summation lasts 10 seconds. The effect stacks up to 4 times, occurs once every 1 seconds, and activates even if the character is not active. | The character's elemental explosion deals periodic Pyro damage, which effectively explodes the cores, which will increase the damage from the reaction. Overall, this is the best Blossom set, but only 2-5% stronger than Gilded Dreams. Works worse if the mastery of the elements is less than 300 units. |
 Gilded Dreams Gilded Dreams⭐️⭐️⭐️⭐️ ⭐️⭐️⭐️⭐️⭐️ | 2 parts: Increases Elemental Mastery by 80. 4 parts: For 8 sec. after calling an elemental reaction, depending on the elements of the allied heroes in the squad, the equipped character receives the following buffs:
| The set can provide a total of 230 units. mastery of the elements (provided that Toma is the only Pyro character), allowing you to concentrate on pumping energy recovery. In addition, it is much more efficient in terms of resin waste. |
Paradise lost flowerGilded Dreams Itinerant ensemble Itinerant ensemble | 2 parts: Increases Elemental Mastery by 80. 2 parts: Increases Elemental Mastery by 80. | A combination of artifacts that gives a total of 160 units. It is recommended to use if it is not possible to collect 4 parts of the previous two sets. |
 Crimson Witch of Flames Crimson Witch of Flames⭐️⭐️⭐️⭐️ ⭐️⭐️⭐️⭐️⭐️ | 2 parts: Increases Pyro damage bonus by 15%. 4 parts: Increases the Damage of the Overload and Burning statuses by 40%, and the damage of the Vapor and Melting statuses by 15%. Using an elemental skill increases the effects of a 50-piece set by 10% for 3 seconds. Can stack up to XNUMX times. | A full set can increase the damage of the Burn reaction by 40%, however, there are much more optional sets for Toma. |
Squads for Tom
Most often, Toma is placed as a support for characters who need protection from interrupting attacks or incoming damage. It also pairs well with heroes of various elements, acting as a reactor.
Best characters
Let's analyze the characters that can be put on a team with Toma:
| Character | Element | Weapon | Effects |
|---|---|---|---|
 Al-Haytham Al-Haytham |  Dendro Dendro |  One handed sword One handed sword | The main damage dealer, for which Toma can be used both as a shield, and as a secondary source of damage outside the battlefield to trigger a reaction. |
 Nahida Nahida | Dendro |  Catalyst Catalyst | Universal hero in any Dendro squad. Increases damage dealt by reactions and grants a buff to Elemental Mastery when using your ultimate. |
 Kaveh Kaveh | Dendro |  Two-handed sword Two-handed sword | Budget alternative to al-Haytham. At the same time, he is more focused on the game from Budding, including Bloom. |
 Dendro Traveler Dendro Traveler | Dendro | One handed sword | A free Dendro character that has pocket powers to inflict elemental status. All constellations can also be obtained without any problems. |
 Collei Collei | Dendro |  Bow Bow | Although Dendro casts less actively than the Traveler, it is a good sub-dp with good own damage. Increases Elemental Mastery at C4. |
 Yae Miko Yae Miko |  electro electro | Catalyst | An alternative to Raiden with more emphasis on AoE damage. At the same time, it experiences much more problems with interrupting attacks, which is why it needs constant protection. |
 Keqing Keqing | electro | One handed sword | Electro damageer with infusion and good mobility. |
 Fischl Fischl | electro | Bow | Inflicts Electro status almost continuously and deals damage from the pocket due to the summoned Raven of Oz. |
 Xingqiu Xingqiu |  Hydro Hydro | One handed sword | One of the best allies for invoking the Blossom reaction due to a fairly long elemental explosion that attacks with water in conjunction with the active hero. |
 Ye Lan Ye Lan | Hydro | Bow | Excellent hydro applicator. Additionally increases damage during the duration of the ultimate. |
 Tartaglia Tartaglia | Hydro | Bow | The main damage dealer that summons water blades with a skill. Can be played with Touma through Steam or Bloom. |
 Ayato Ayato | Hydro | One handed sword | Although most often the main damage dealer, thanks to an elemental explosion that deals Hydro damage in an area, he is able to help by imposing a status from his pocket. |
 Kokomi Kokomi | Hydro | Catalyst | Healer in the squad through the Blossom. In addition to healing, it is capable of dealing damage when using an ult. |
 Mona Mona | Hydro | Catalyst | Summons a jellyfish with a skill that attracts the attention of enemies. An elemental explosion creates a bubble on enemies, which is subsequently destroyed and increases all damage dealt. |
 Klee Klee |  Pyro Pyro | Catalyst | Pyro damage dealer with ranged attacks. Has explosive damage that acts in an area. |
 Hu Tao Hu Tao | Pyro |  A spear A spear | Often found at low health due to a mechanic that loses some HP in exchange for increased damage. Therefore, she needs a shieldman in the team. |
 Yoimiya Yoimiya | Pyro | Bow | Being an archer, she faces the fact that opponents interrupt her combo with blows. Touma will not only close the resonance, but also provide Eimiya with a shield. |
 Itto Itto |  Geo Geo | Two-handed sword | Thanks to the Crystallization reaction, the leader of the Arataki Gang will be able to almost constantly create a shield when Touma uses his elemental burst. |
 Ganyu Ganyu |  Cryo Cryo | Bow | Primary/secondary dd. Unleashes ice shards on enemies with her ultimate skill. |
 Ayaka Ayaka | Cryo | One handed sword | After sprinting, he receives Cryo infusion on normal attacks, thanks to which he can consistently trigger the Melt reaction. |
 Kazuha Kazuha |  Anemo Anemo | One handed sword | Dispels a Pyro status that inflicts Tom with an elemental explosion. Increases elemental damage. |
 Sucrose Sucrose | Anemo | Catalyst | Budget alternative to Kazuha. Pulls with skill and ult. Increases allies' elemental mastery. |
 Wanderer Wanderer | Anemo | Catalyst | Anemo DPS that floats in the air while using an elemental skill. Touma will help him escape control and provide Pyro with a status to dispel. |
Top Teams
The table below provides sample units for Touma based on the heroes listed above.
| Character 1 | Character 2 | Character 3 | Character 4 | Features |
|---|---|---|---|---|
| Nahida |  Thoma Thoma | Xingqiu |  Kokomi Kokomi | Squad through Bloom with Nahida. Toma in this case provides Pyro damage outside of the battlefield to detonate Dendro cores. |
| Ayato | Nahida Dendro ggCollei Dendro ggCollei | Kazuha | Thoma | Alternate squad via Bloom. Ayato with Dendro the character sap-dd creates cores, and Toma blows them up with an ult, creating a reaction. Kazuha increases el. unit damage and pulls. |
Wanderer Heizou Heizou |  Faruzan Faruzan | Thoma |  Bennett Bennett | A squad with Wanderer/Heizo as the main damage dealer. Faruzan increases Anemo damage and debuffs enemies. Toma casts a shield, deals Pyro damage outside of the battlefield to dispel. Bennet heals and closes the Pyro Resonance. |
| Itto |  Goro Goro |  Albedo Albedo | Thoma | Geo-team with Itto. Instead of Zhongli, it is quite possible to put Tom in the last slot as a defense, which will also allow you to activate the Crystallization reaction. |
| Hu Tao | Thoma | XingqiuYe Lan | SucroseKazuha | Hu Tao is the main damage dealer who is on the battlefield most of the time. Toma provides Hu Tao with a shield. Xingqiu or Ye Lan inflicts Hydro, while Kazuha or Sucrose dispels. |
| Al-HaythamKaveh | Thoma | Xingqiu | Ye Lan Mona Mona Barbara Barbara | Team through the Blossom with al-Haytham or Kaveh. Hydro characters with pocket skills allow the main damage dealer, who possesses infusion, to create and detonate cores with Toma's ult. |
| Tartaglia | NahidaDendro ggCollei | Thoma |  Dione Dione | Pyro damage outside of the battlefield from Toma, combined with Tartaglia's Hydro damage in succession, creates a powerful multi-target oriented lineup. Dione at the expense of Cryo will provide higher generation of nuclei. |
| Yoimiya | Thoma | XingqiuYe Lan |  Yun JinSucroseKazuha Yun JinSucroseKazuha | With Touma being able to provide interrupt resistance, activate Pyro Resonance, and at C6 increase the damage of normal attacks, he is an extremely valuable ally for Eimiya in any lineup. |
| TartagliaAyato | Thoma | Sucrose | Bennett | A more secure version of the group with Tartaglia and Ayato via Par. Touma's goal is to deal Pyro damage outside of the battlefield, so that Hydro characters will activate the reaction, as well as constantly applying a shield. |
| Ayaka |  Ganyu Ganyu |  Xiangling Xiangling | Thoma | Team through Melting with Ayaka as the main damage dealer. Ganyu and Xiangling apply extra. damage outside the battlefield. Touma places a shield on the active character. Due to the fact that Pyro damages give status from the pocket, Ayaka will be able to hit under the reaction. |
| Keqing | FischlYae Miko | Thoma | Bennett | Reloading detachment with Keqing. Due to her high mobility, she does not experience problems with the fact that opponents are thrown back when a reaction occurs. |
How to play Tom

Auto attacks rather weak, which immediately displaces him from the place of the main dd. However, this problem applies to all skills. His main task is to support the group with a shield. You can also add Pyro status overlay, set support Noblesse Oblige and energizing the spear of Favonius.
Elemental Skill Deals fairly low damage, especially given the long cooldown. But at the same time, he activates the shield, which is not bad. For example, at lvl 10 of a skill and at 30k HP, the durability is only 5400 damage. Although this is quite small, it is worth considering that shields can be stacked.
elemental explosion for Toma it becomes his bread and salt. During the ult, inflicts Pyro splash damagewhen allies (or himself) make normal attacks, and also applies shields. These shields are weaker than those from the skill, but they stack with it and with each other on each cast, becoming stronger.
Rotation
When playing as Toma, we recommend that you stick to the following rotation during the battle:
- Use elemental skillto activate the shield and create particles to gain energy.
- Switch between characters and fight until the elemental explosion is charged.
- Return to Toma and activate elemental explosionto cast another shield and refresh its duration, and immediately afterward cast email skill.
- Use normal attacks on the main damage while the ultimate is active to periodically trigger a Fire Rupture effect and deal AoE damage to the Pyro.
- Repeat from number 1.
There is a difficulty here - you need to notice the end of the ult, and then keep in mind the duration of the shield in order to reactivate it with a skill before it ends. Actually, by this time the ult should already be ready, and then the rotation can be repeated.
Conclusion on the character
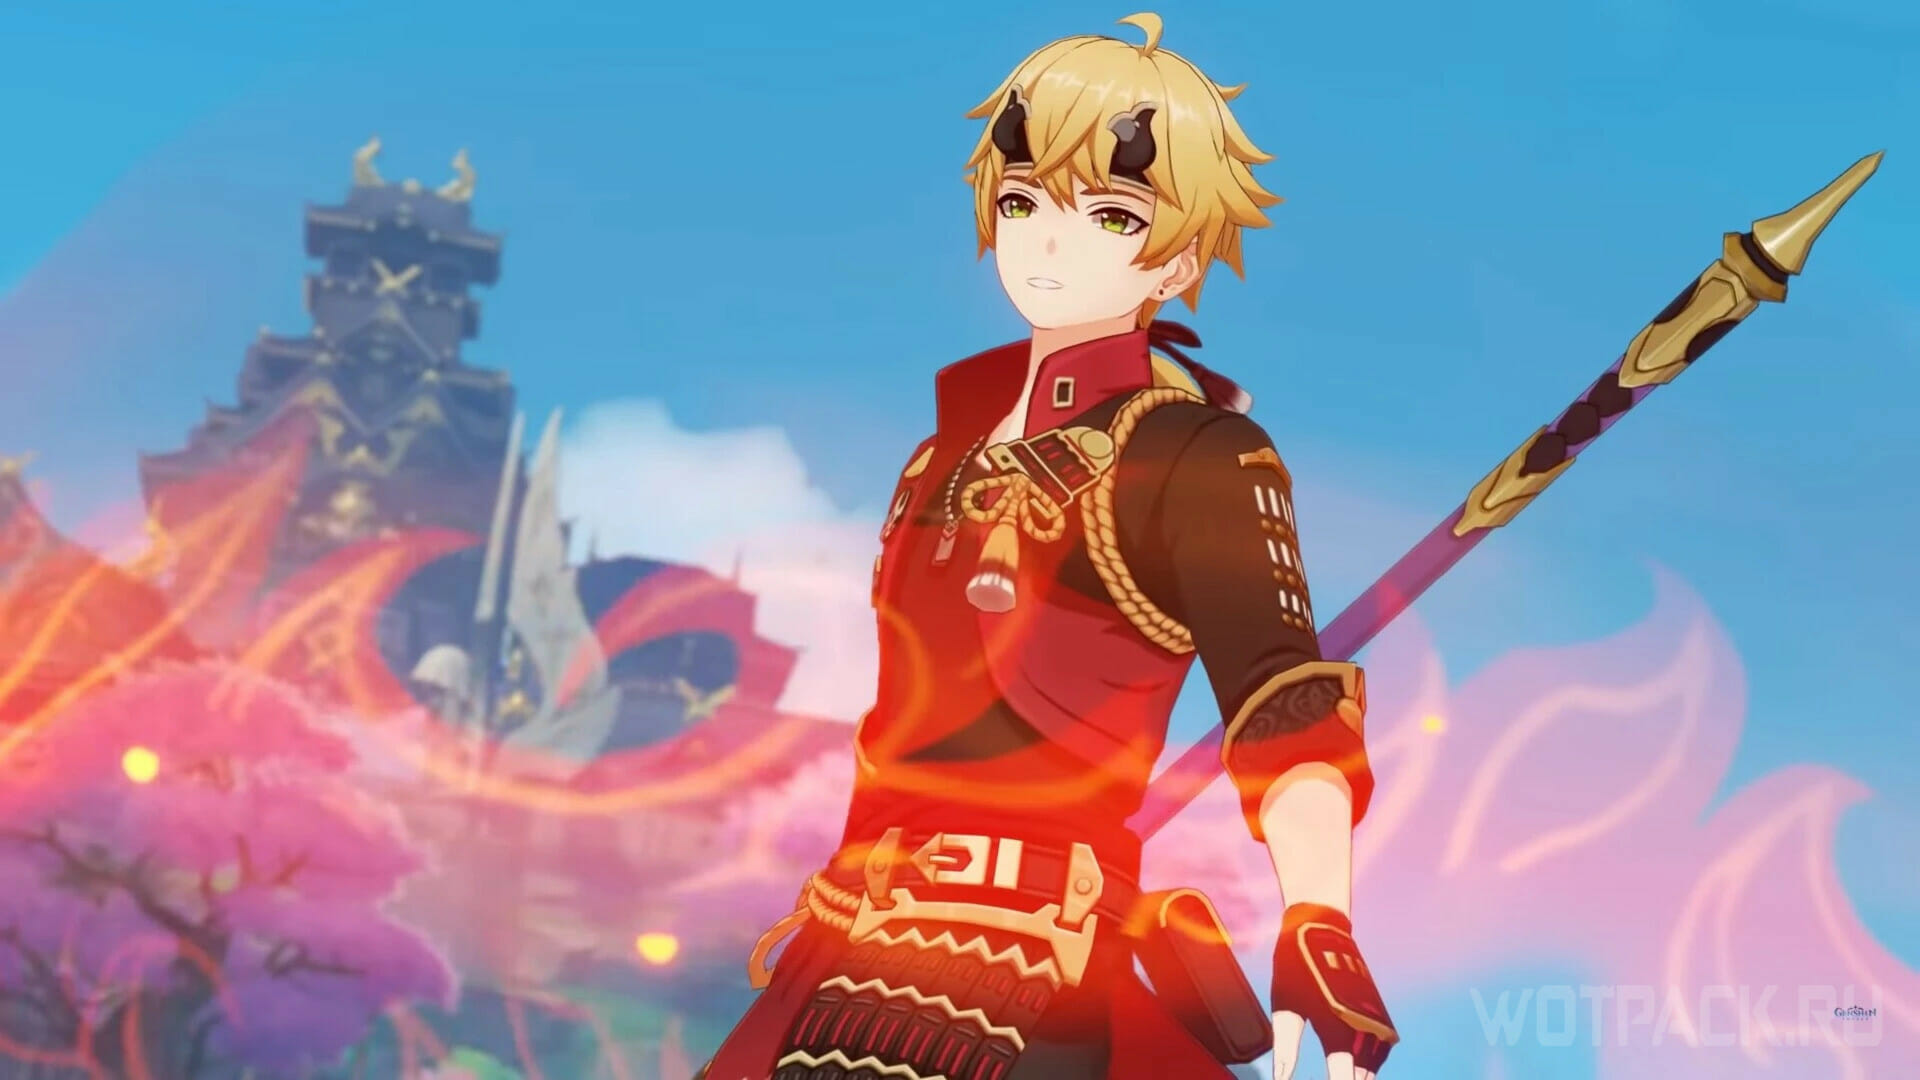
![Tom in Genshin Impact – guide [best builds]🔥](/wp-content/uploads/2021/10/maxresdefault-2.jpg)
Toma is a support character whose main task is to cover the group by creating a shield. Potentially, he has one of the most durable shields in the game, but requires timing and rotations to do this, which is especially difficult for beginners and in general requires studying the character and its mechanics.
In section with Genshin Impact builds actual builds for each character in the game are presented. Also, in a separate article, you can read best squad builds.
Questions and answers about Tom
Who is Tom?
Touma is the 4⭐️ playable character of Elemental Pyro in Genshin Impact. Serves as a householder in the Kamisato household and works for Inazuma's welfare, however was born in Mondstadt.
When was Tom added to Genshin?
Tom was added to the game on November 2, 2021.
Who voices Tom?
English voice actor - Christian Banas. Japanese voice actor - Masakazu Morita. Chinese voice actor - Pei Zhang. Korean voice actor - Ryu Seung-gon.
Which group does Tom belong to?
Yashiro Commission, Kamisato Clan.
When is Tom's birthday?
9 in January.
What is Tom's zodiac sign?
Capricorn.
How old is Tom?
Tom's age is about 23-27 years old.
How tall is Tom?
Tom's height is 180-185.
Where is Tom from?
Mondstadt.
What is Tom's element?
Pyro.
Where is Toma's Eye of God?
Attached to ropes at the waist.
What is the name of the constellation Toma?
Red shield.
What is Tom's personality like?
Toma has a friendly personality, thanks to which he can easily find a common language with almost anyone. This quality helped him adapt to Inazuma, where he had long been considered an outsider.
What does Tom love?
Tom's favorite dish is Warmth.
When is Tom coming?
Tom can always be obtained from a standard banner.
What to download Tom?
Tom needs to pump elemental skill and ult.
What artifacts are better to put on Tom?
Tom needs the Noblesse Oblige set.
What is Touma's signature weapon?
Tom has no sign.
What is the best weapon for Tom?
Homa Staff, Favonius Spear, Black Brush.
How many glowing mushrooms does Touma need?
168 pieces.
How much hero experience do you need for toma level 90?
To raise Toma to level 90, 421 hero experience books are required.
How good is Toma in Genshin Impact?
Touma has a strong shield to protect the squad, and is also able to impose a Pyro status for exploding nuclei or a Steam reaction.
Who is Touma for Ayaka?
Toma plays the role of a close friend and servant for Ayaka. It was Ayaka who accepted Toma into the Kamisato clan and allowed him to protect their family.
What does Ayato call Tom?
Ayato calls one of the most loyal people to the clan, who can be trusted.
What does Touma call Ayato?
Touma calls Ayato "young master". In Japanese, he adds the suffix "-sama".
Who is Touma for Ayato?
Toma is Ayato's servant as he works for the Kamisato clan. However, they can also be called friends, as they are close and trust each other.
What is on Tom's head?
Tom wears a metal one with horns on his head. This detail refers to the image of Kabuto helmets, the equipment of Japanese warriors.
Where does Toma live in Genshin Impact?
Toma lives in Inazuma, although he was born in Mondstadt.